Saturday, I wanted to get some chores done, but Burton had other ideas.
He insisted I get my laundry folded and put away right away so he could get into that sewing room. We had QSTs to make.
18 QSTs to be exact. It took all afternoon to get them done, so we ran out of time for any sort of top assembly. But we did lay them on the bed to see how it would all look.
We actually ran out of room – as we have enough blocks for another row down the left side. It’s going to be a good size quilt, and hopefully, we’ll be able to sew it all together this coming weekend.
Progress on this weekend’s stitching was hampered by a little ripping. I was trying to stitch and watch the final ever episode of the Grand Tour. Normally, like many of you, I just listen when I’m crafting, but some shows have to be watched. And it resulted in quite a few mess ups. Finally, I gave up, put the stitching down and enjoyed the show.
And I went back to the stitching the next day.
I managed to get the spray of buds at the bottom (which was the part I kept messing up), and a couple flowers (almost) done..
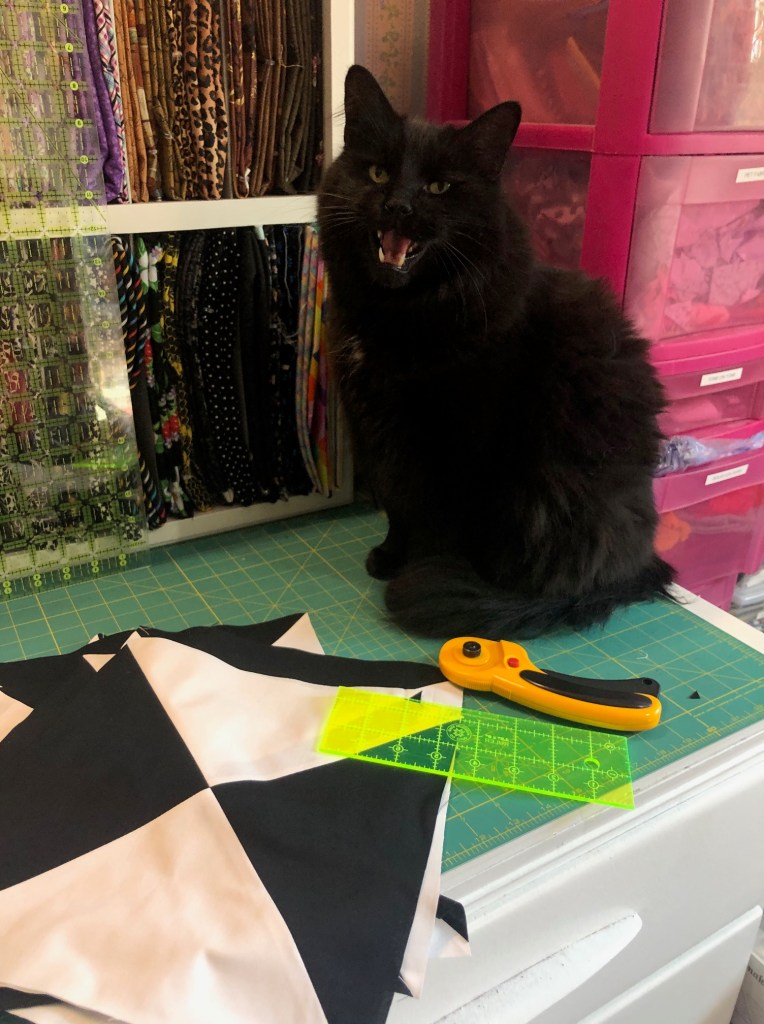
Wheneever I post this project, people always comment on how hard it must be to work on the black. And you’re right – it’s very hard. Especially as it’s 18ct aida, so it’s not only dark, but it’s pretty small too.
Happily, my close-up sight is pretty good (seeing distances is another matter), but it’s still a challenge on the black. So here are my top tips for working with dark aida
If you can’t work in full daylight, invest in a good, bright task light. I have a torchiere lamp that sits behind my chair. So not only do I have the overall light from that, but it has a directable task light that I can point right at my work. And that task light has a very bright LED bulb in it. It helps a lot.
It also helps to have something light behind your work.. light wearing light coloured clothes, or as I usually do, a light quilt on your lap.
As you can see here, it helps to show you where the holes are. (Especially when paired with bright lighting).
Of course, it only works when you black cat DOESN’T insist on laying on your lap while you’re stitching…
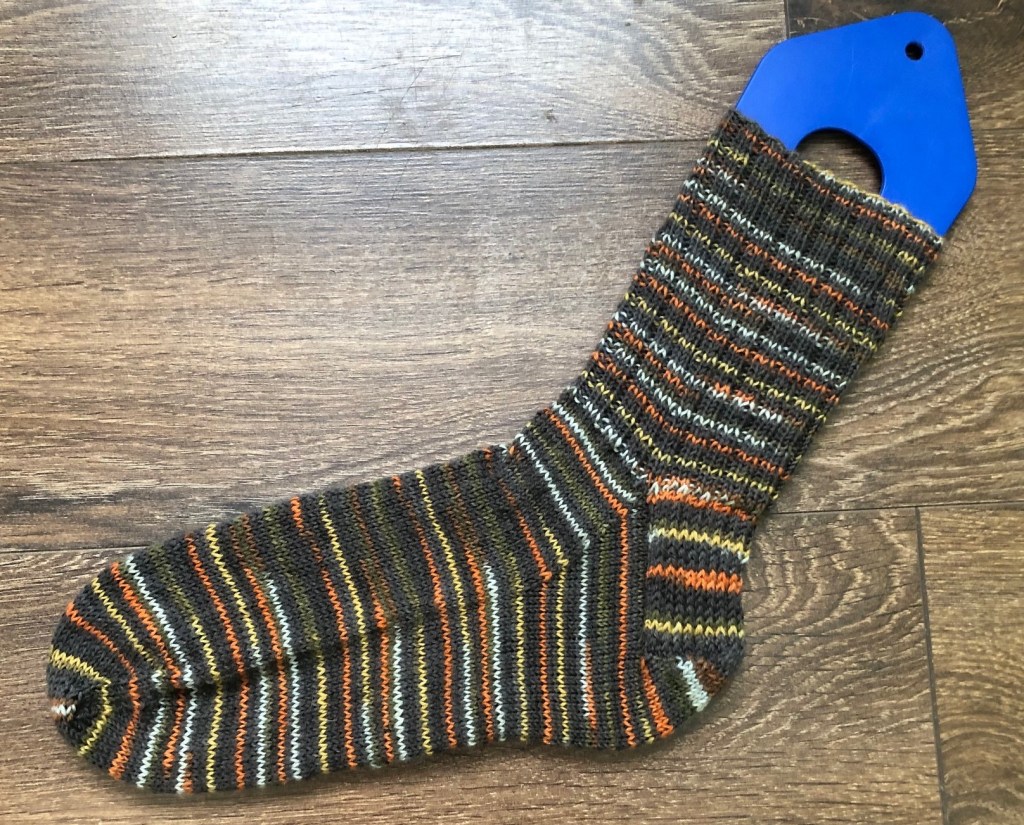
Yes. That is completed first sock. And yes, it’s a man sock. Don’t ask me how it happened so fast… because I’m not entirely sure. I did have a very long, boring work meeting that I knit through, and that definitely did help. And I’ve also been trying to take an hour or two every day after work to enjoy my sunporch… so I guess that was it. But it really didn’t feel like I’d done THAT much knitting. But I guess I did! And there’s the proof. Hopefully the second sock will go just as fast.
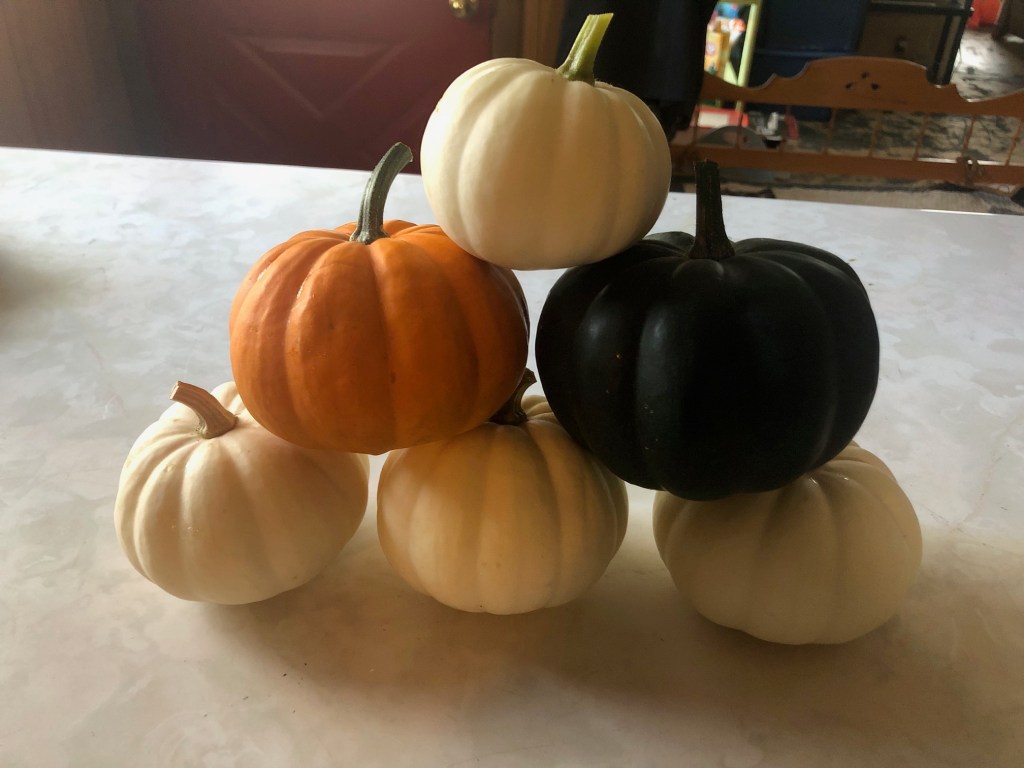
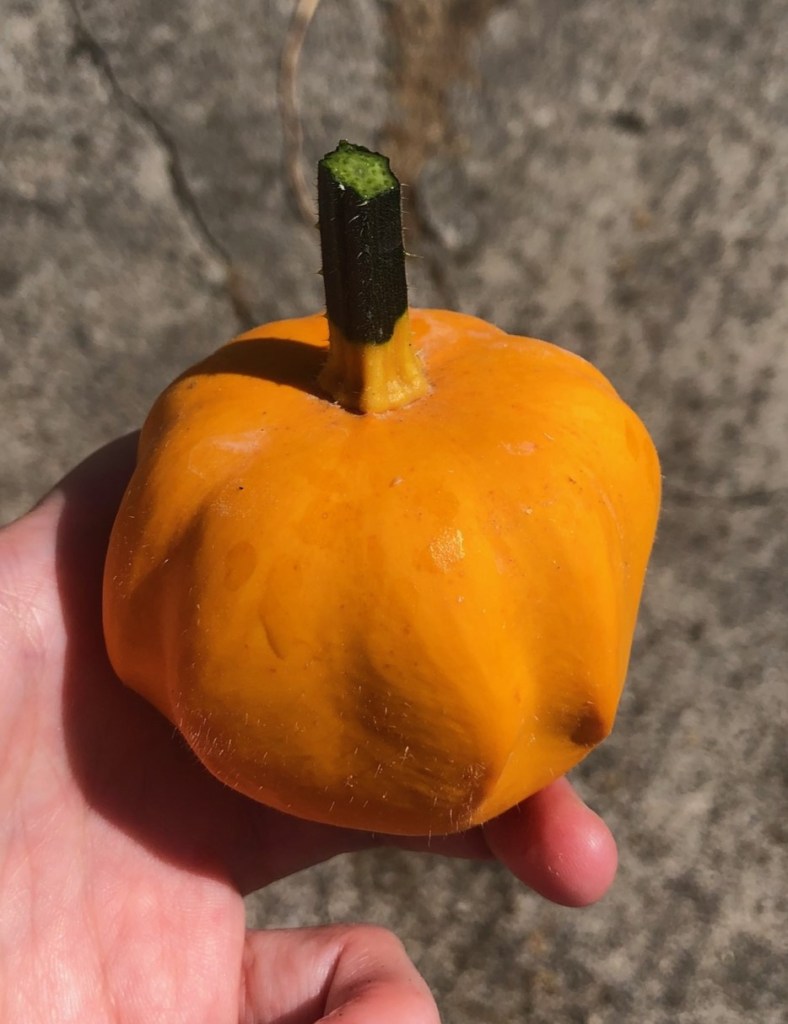
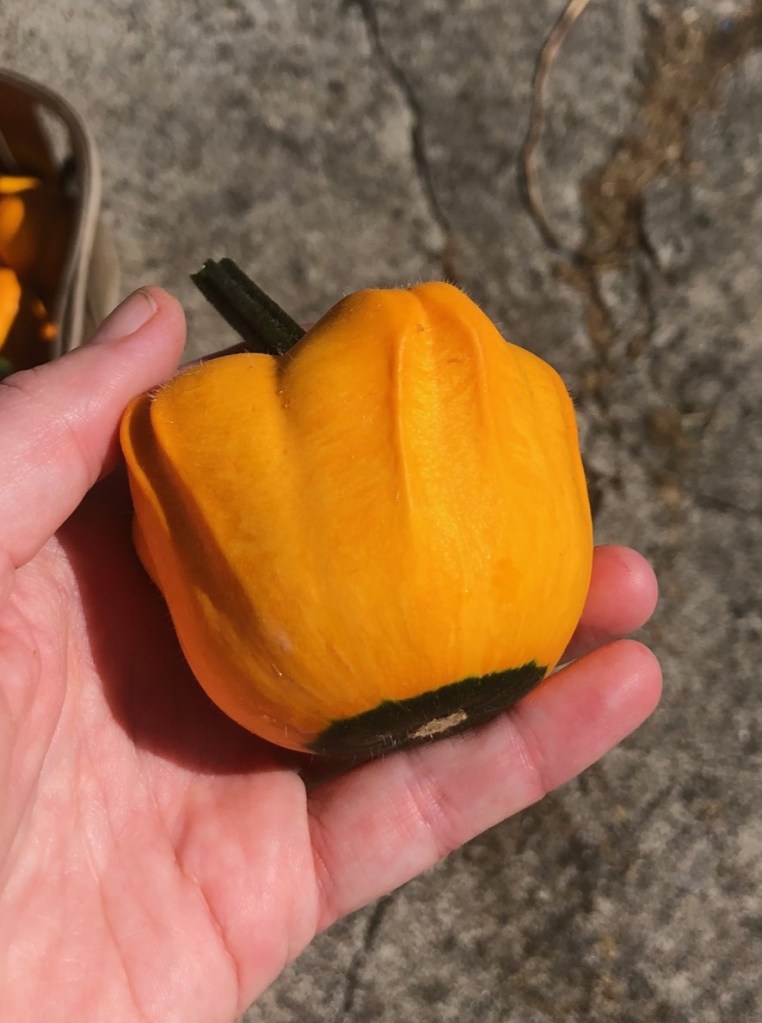
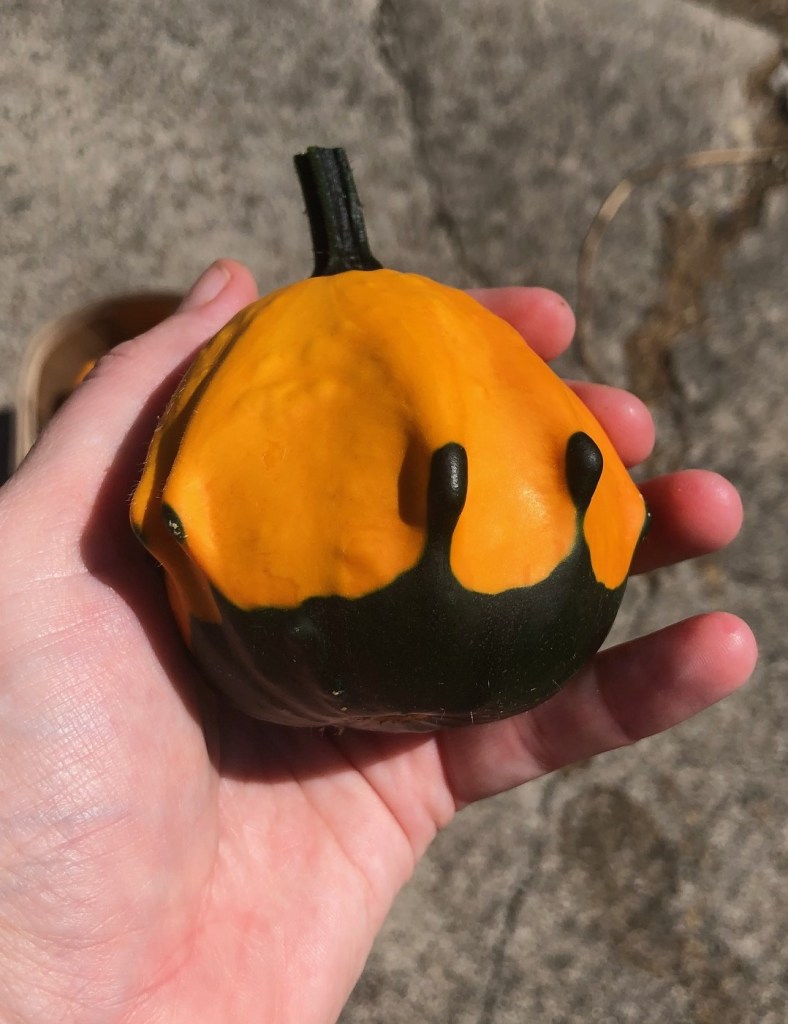
It looks like the squash bugs had gotten to my baby pumpkins – not as bad, but the plants were starting to show signs of dying off, so I decided to pick them. They are just for decorating, so even if they are not ripe, it doesn’t really matter.
They pretty much grew to their full size over a month ago, so I knew they weren’t going to get any bigger. The smallest is the size of an apple, and the biggest about the size of a small acorn squash.
It was a mix of white, orange and black – and as you can see, the ratio was a little off. Id’ have loved a few more orange and black… but I’m still thrilled as it’s my first time growing pumpkins. (I think we grew them when we were kids, but that was over 30 years ago so it doesn’t really count).
I will definitely grow them again. The squash tunnel is perfect for giving them room to run, without taking over the yard.
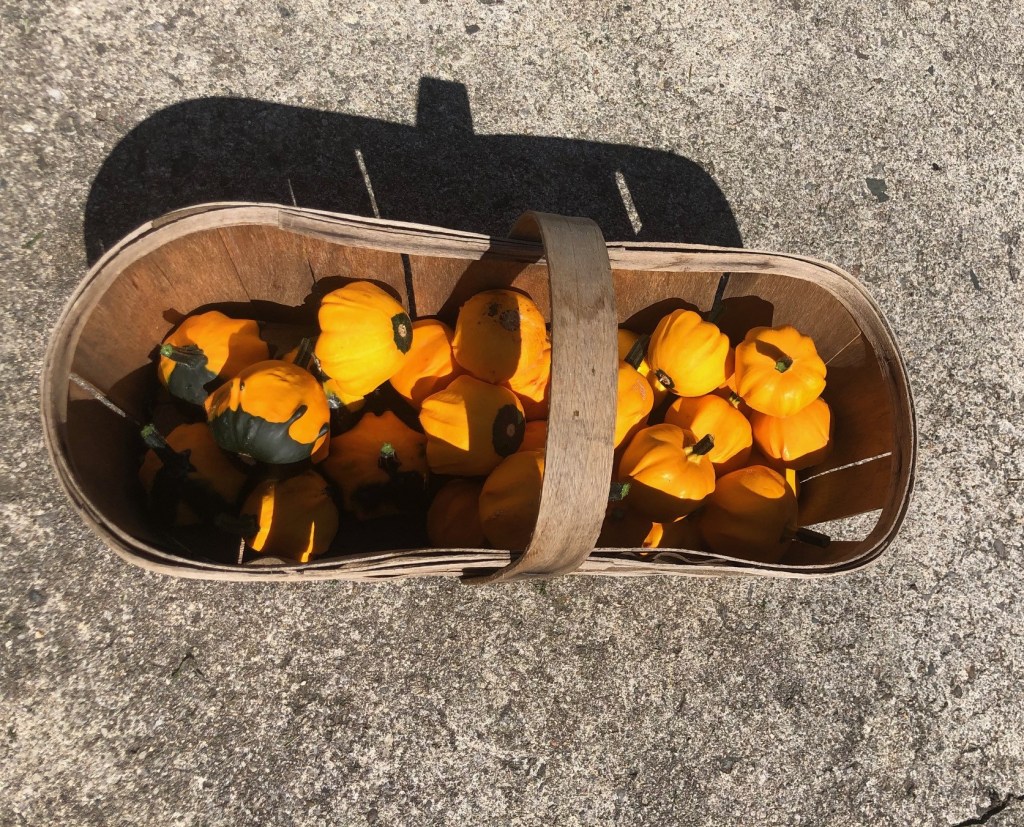
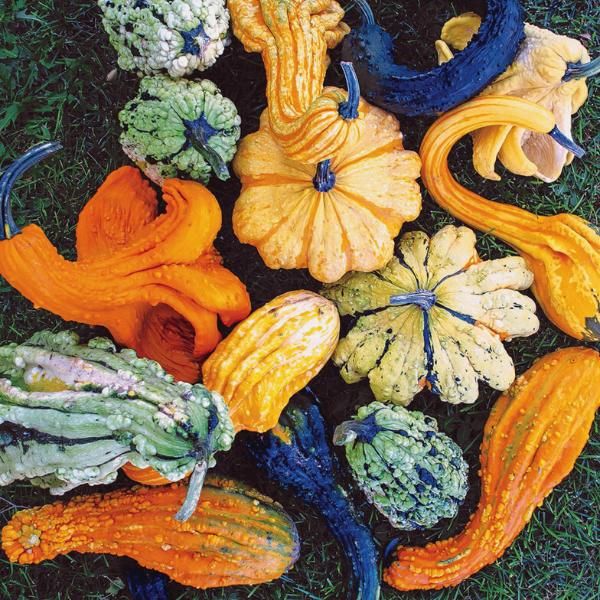
And since I was at it, I decided I might as well harvest the gourds that were full size. You may recall that, like the pumpkins, it was supposed to be a mix that looked something like this…
I didn’t have room to plant all the seeds in the mix…
And while I got a lot of gourds, there were only three types, and they were all pretty similar…
They are definitely cute…but not quite what I had in mind for decorating. I do have the rest of the seeds for next year. And I’m thinking of getting this seed pack
It’s called the “Beetlejuice” mix! How fun is that???
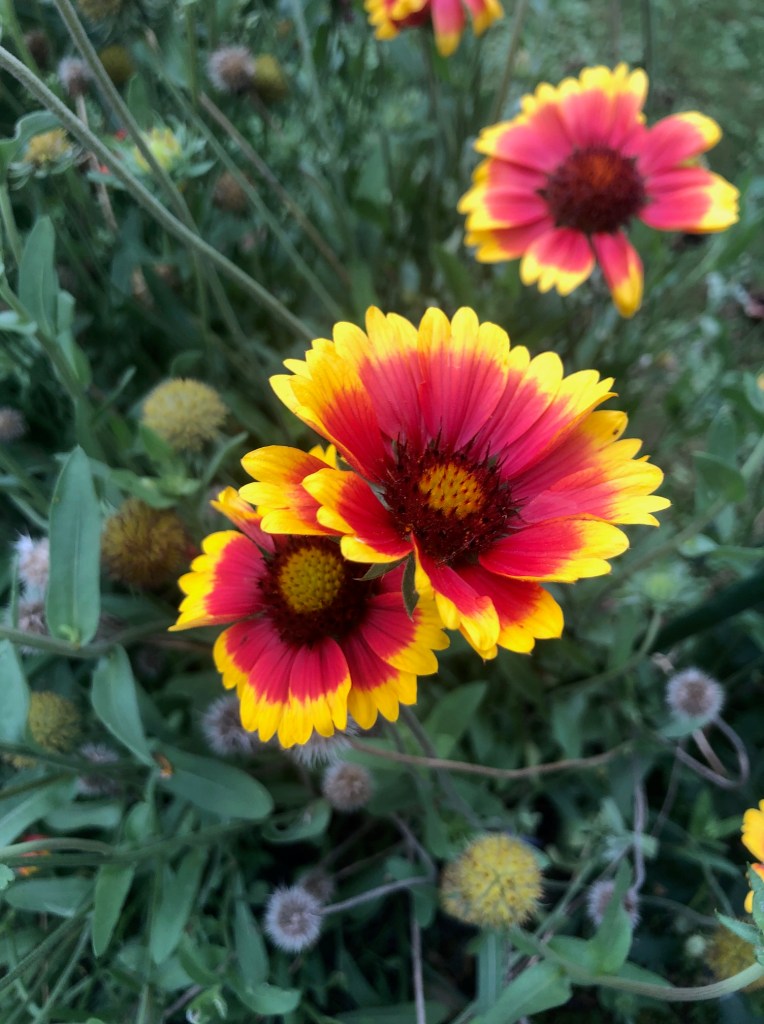
In many ways, September is probably the best time in the garden. The temps are perfect for being out in it, and there’s not as much work… so you can actually sit and enjoy from time to time.
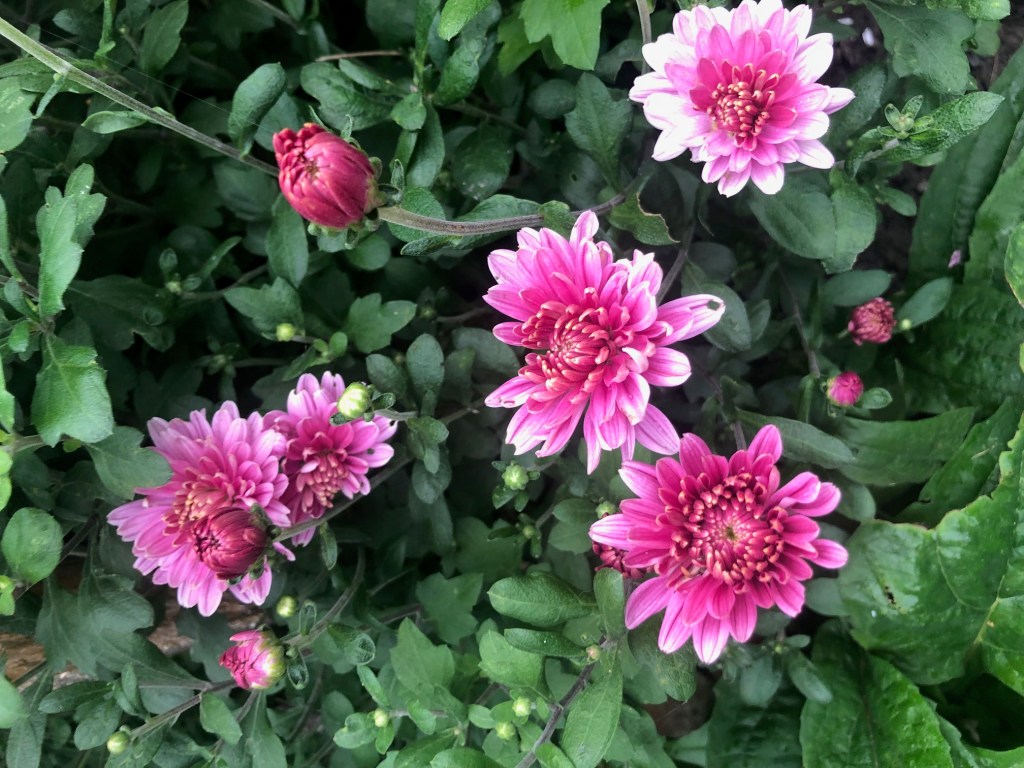
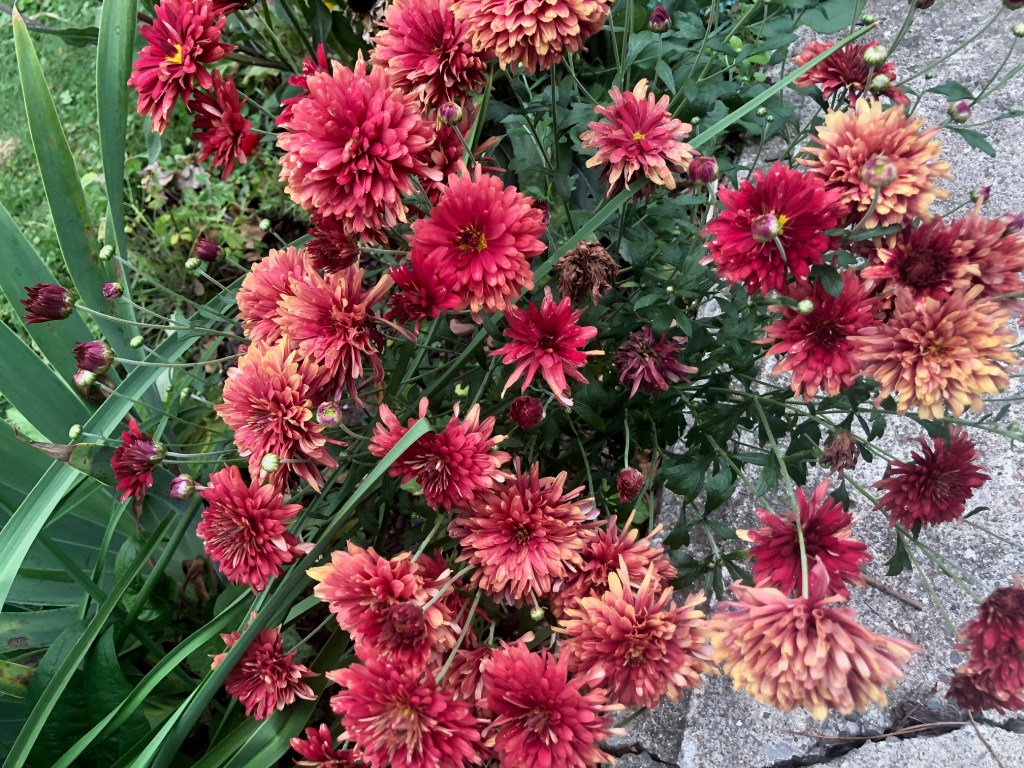
All but one of my mums are blooming – and I switched the front boxes over from roses/pansies to their fall mums.
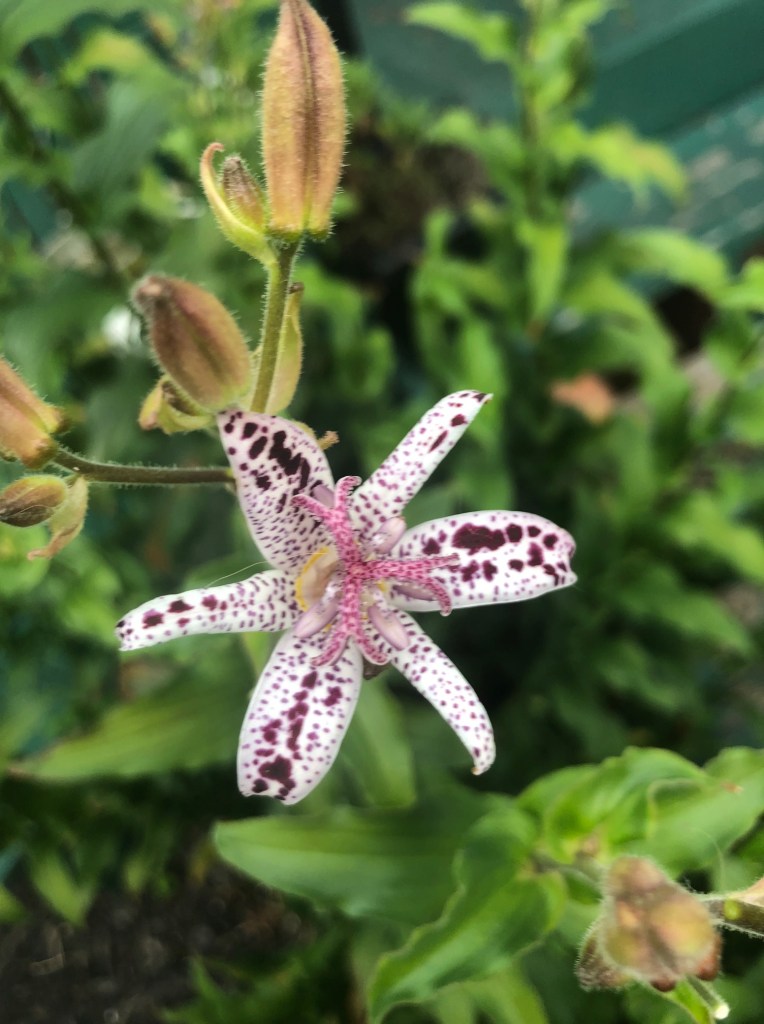
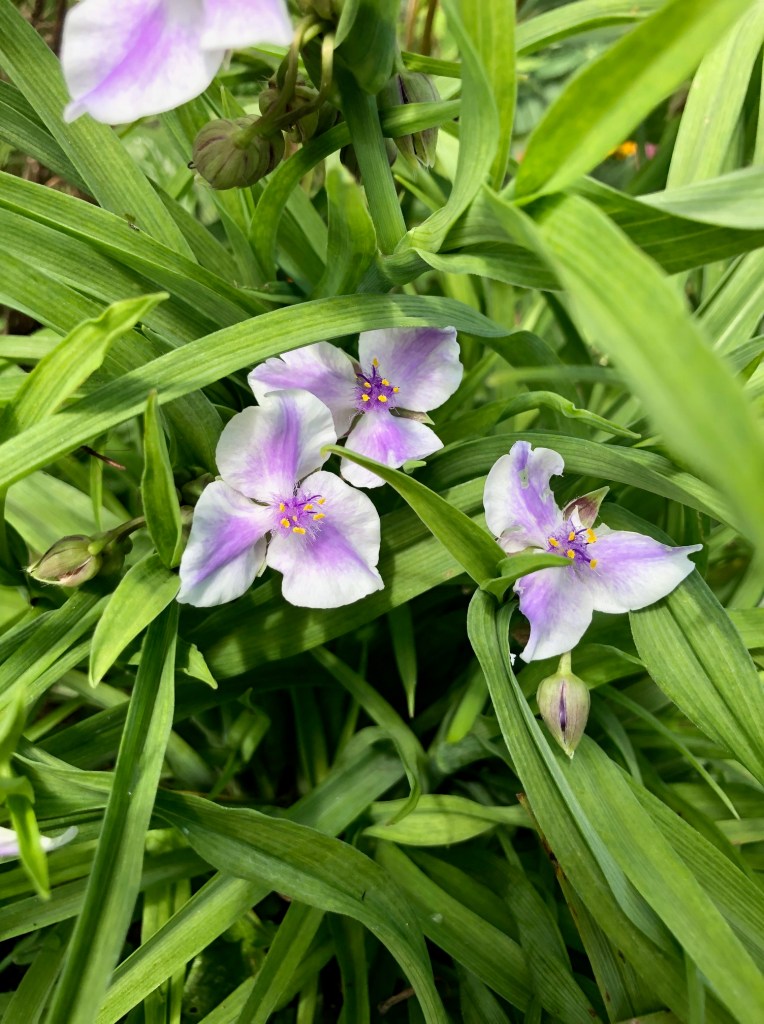
I tried to move the Toad Lilies, but the roots are really hard and thick. I think it’s going to be a spring job – for when the plants are small and I can actually see where I’m digging. The hummers will just have to be faster than Lemmy for the rest of the season.
I have sedum throughout the gardens and it’s in full bloom and giving the bees a regular feast.
And of course the black-eyed susans are shining bright.
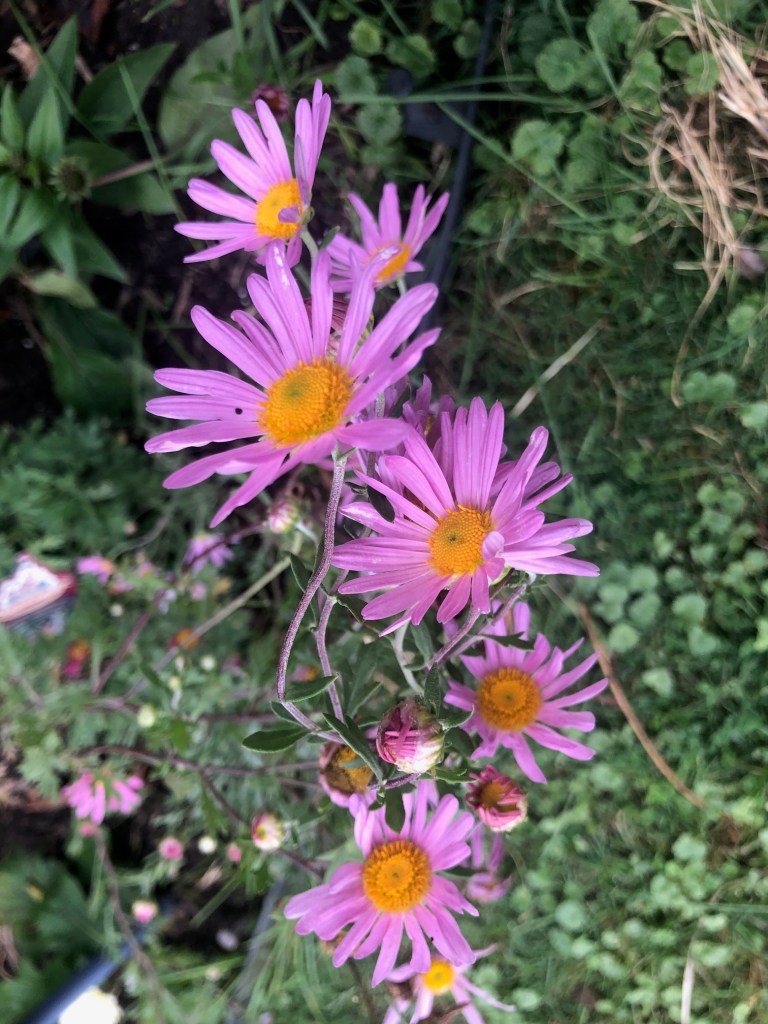
And the asters have finally bloomed. All the fall favourites are here!
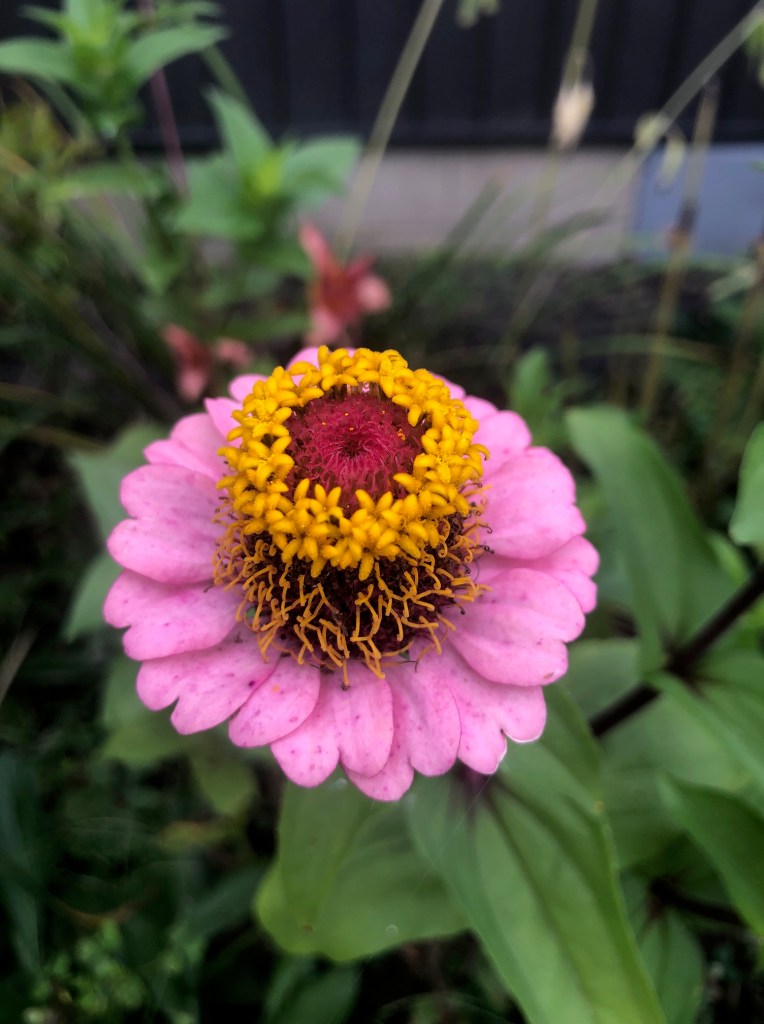
But it’s not just the regular autumn staples that are going strong.
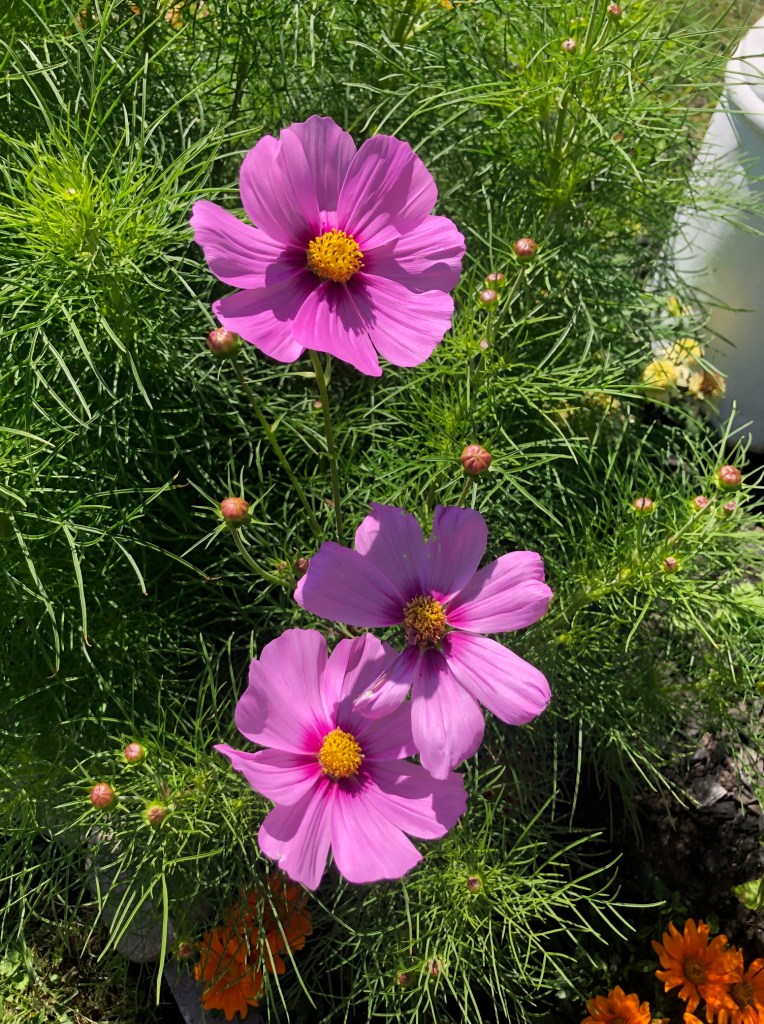
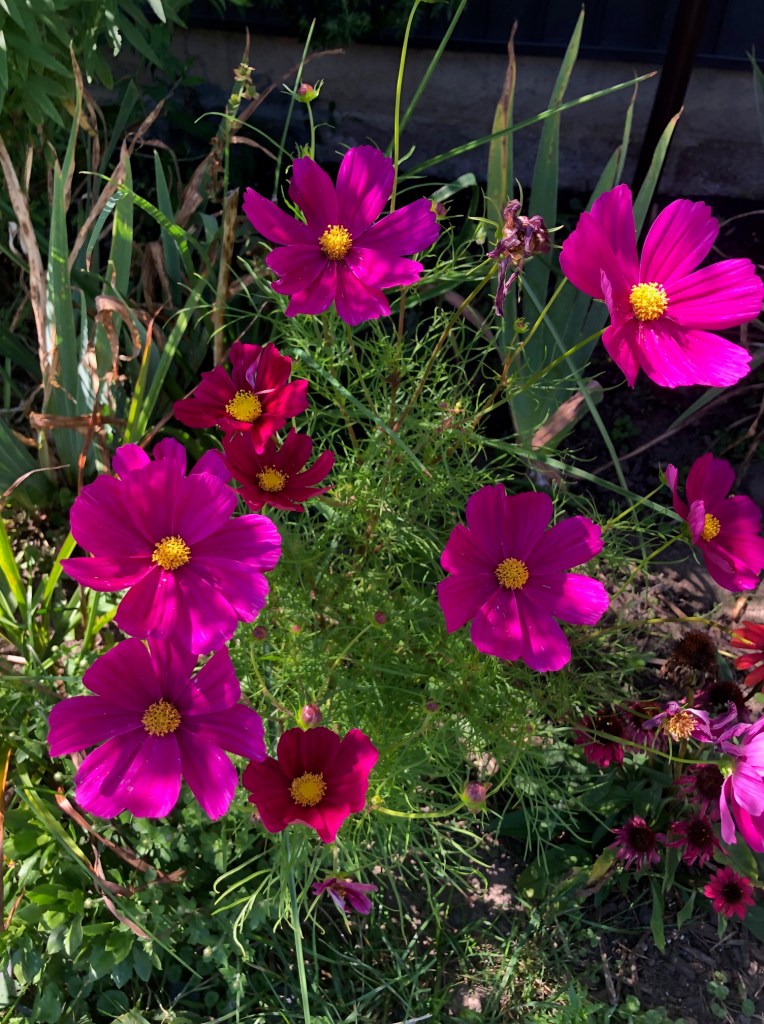
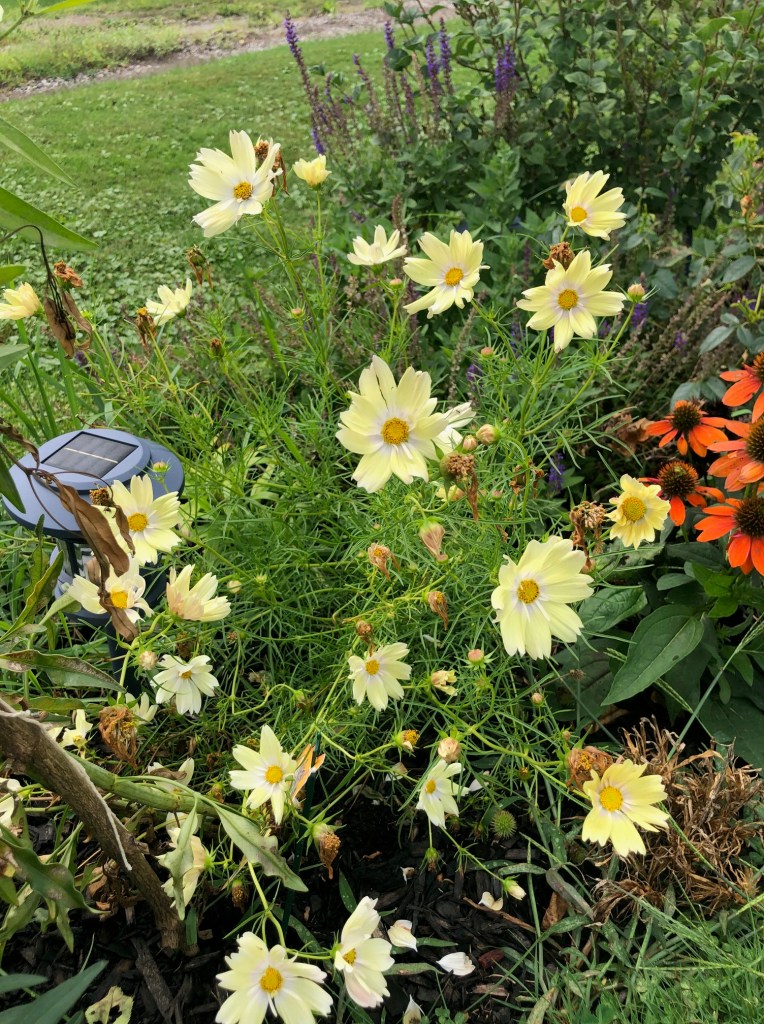
All the annuals in the island garden are going strong – especially the cosmos
There are two other cosmos in the gardens, and both are doing well.
If you regularly dead-head cosmos, they will last right to the first frost. In a couple weeks, I will start letting these go to seed though – I want lots more for next year!
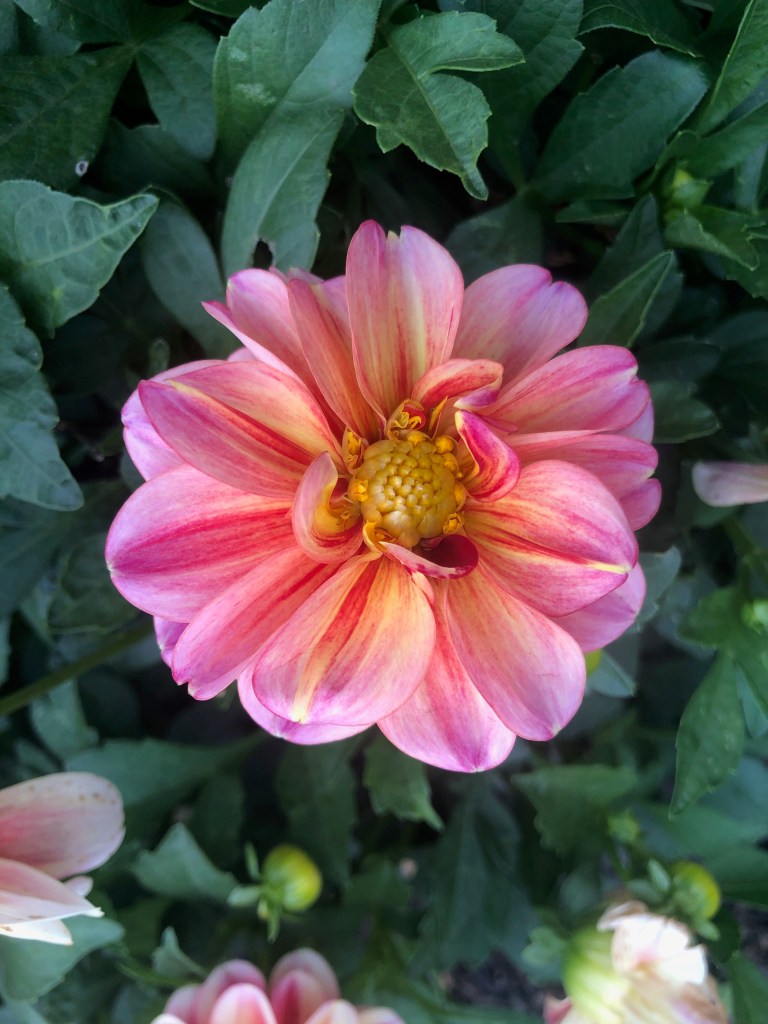
The dahlia in the island garden is also going gang busters. I’m debating on pulling this one up before the frost. Dahlia’s can’t handle our winters, but you are supposed to be able to keep the tubers dormant. I’ve never had any luck with that but it might be worth another try.
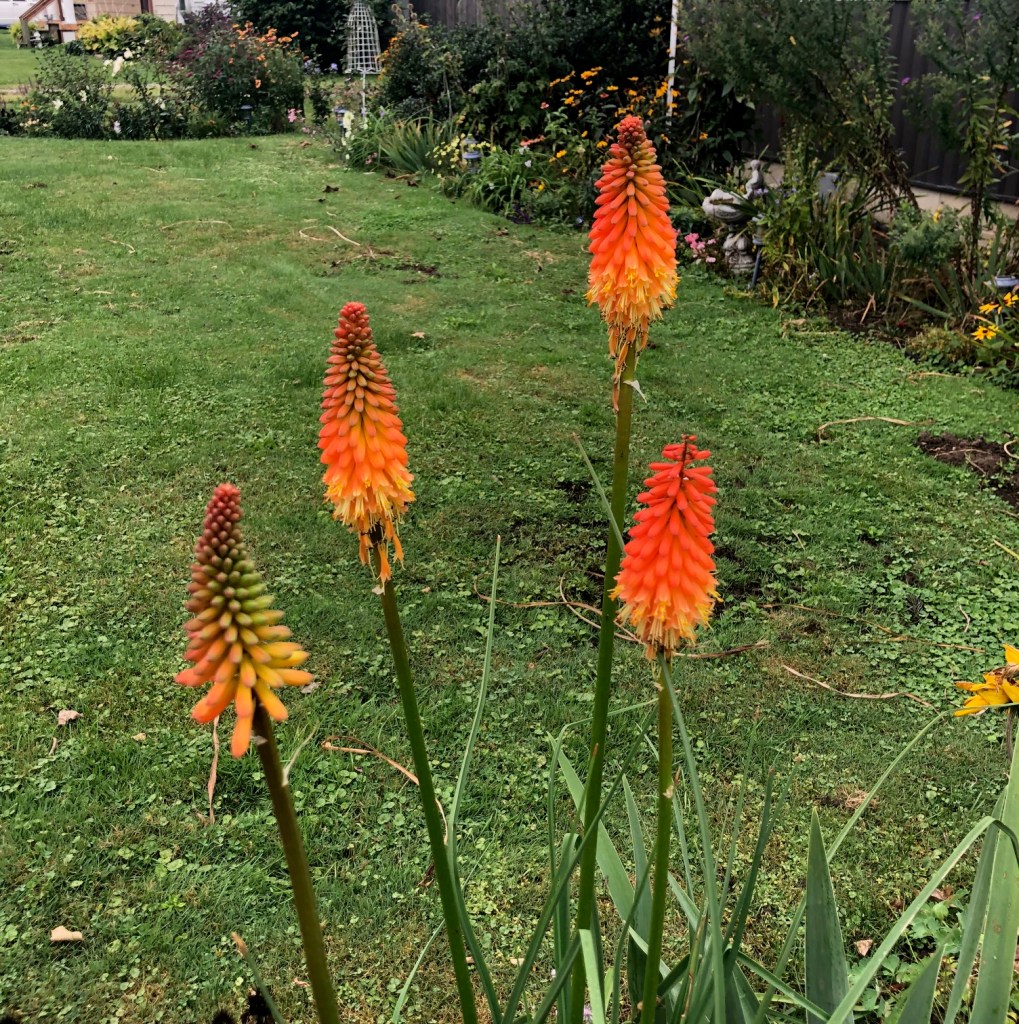
The Red Hot Pokers surprised me by putting up four new pokers. They are standing tall and bright in the front yard.
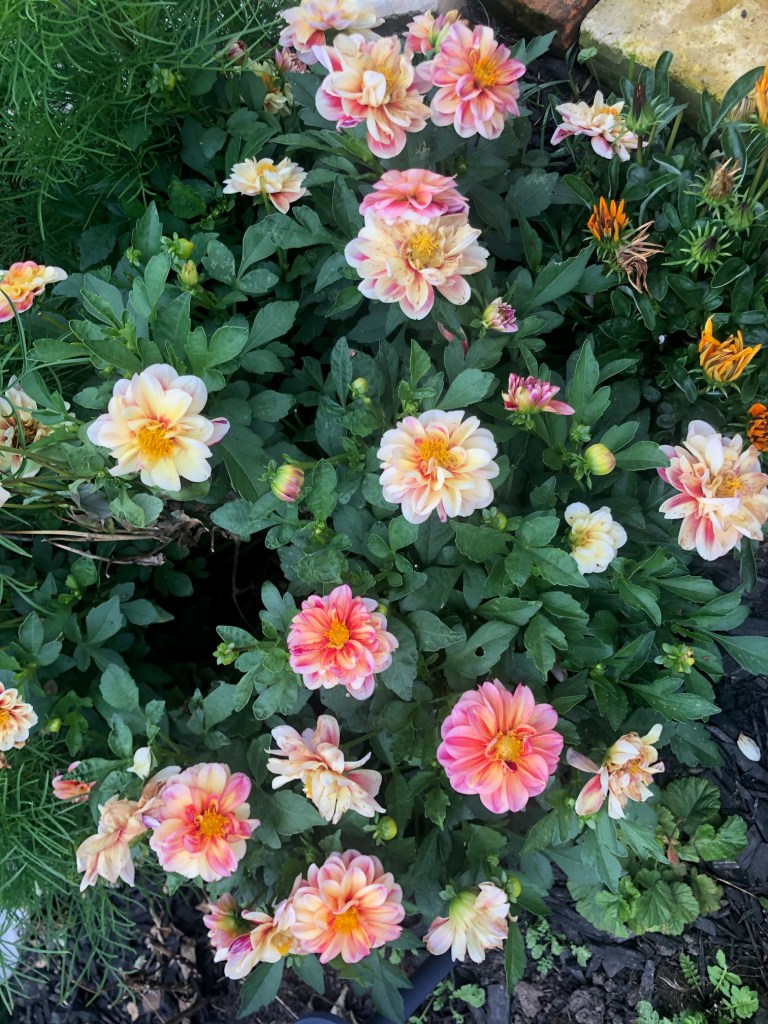
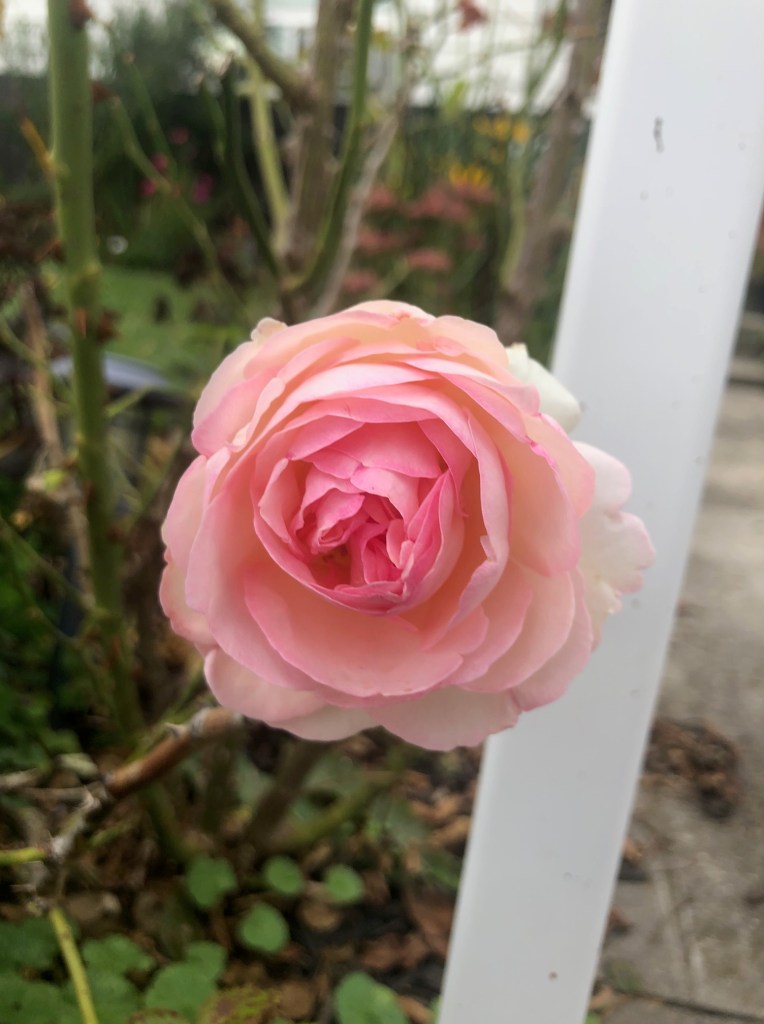
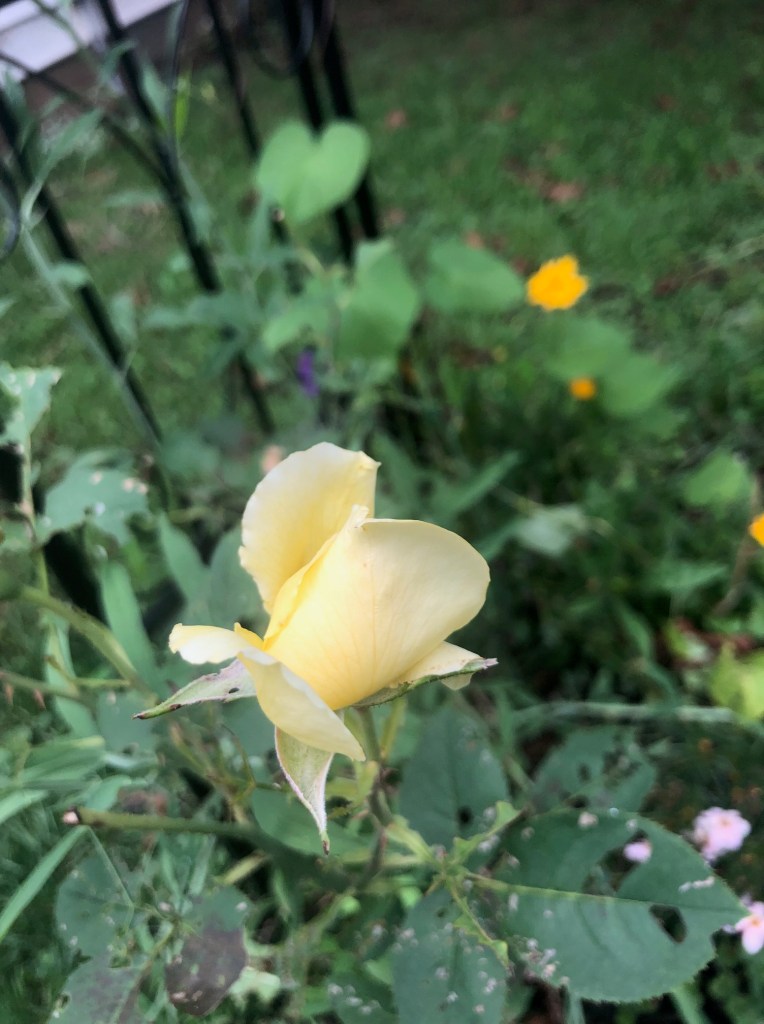
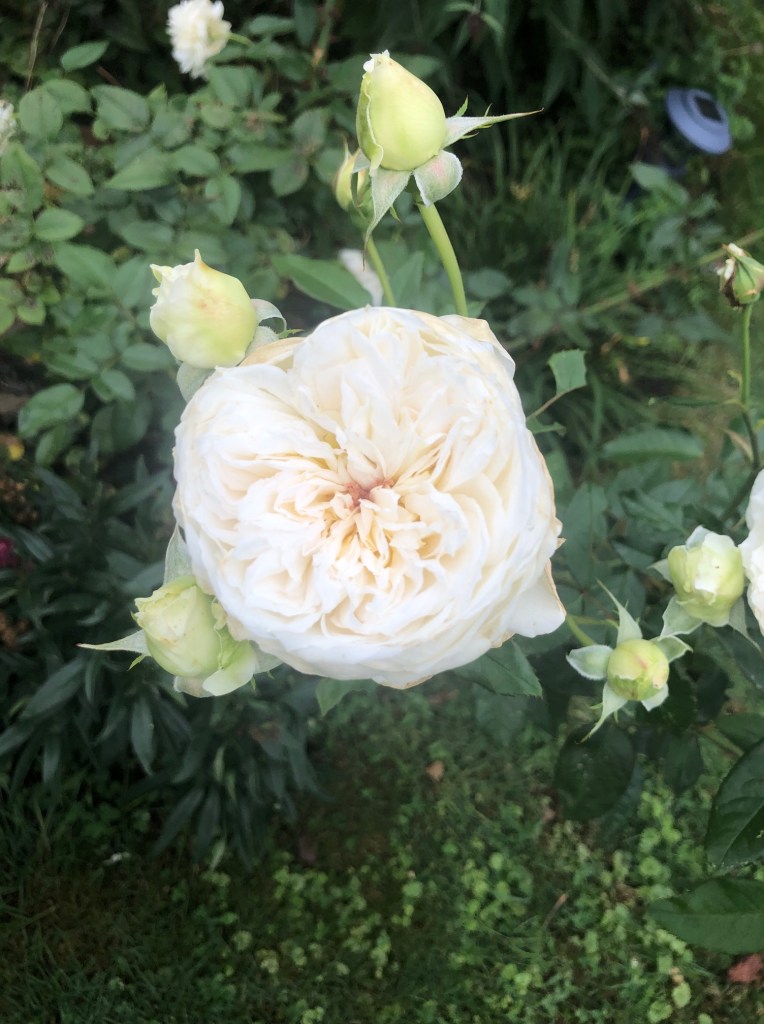
And the roses are all taking their turns blooming.
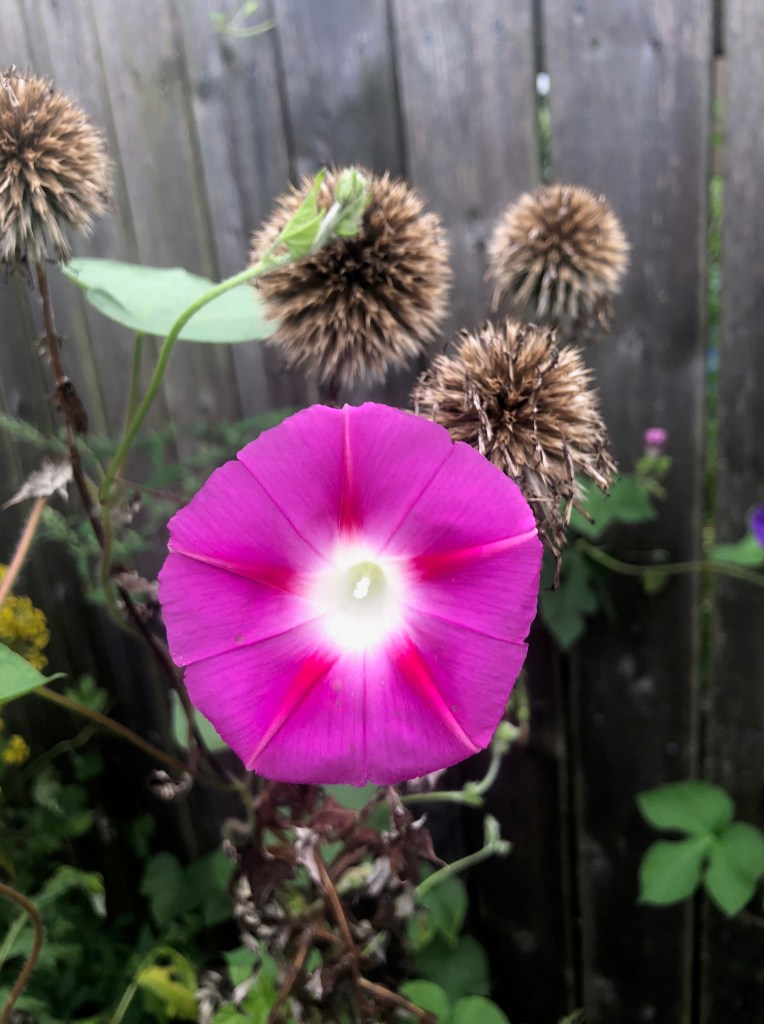
The neighbour planted some morning glories, and eventually they find their way over the fence. The Globe Thistle are done for the season (I leave the seed heads for the birds), but they make a nice trellis for the Morning Glories.
It may be September, but we’ve got weeks of gorgeous garden to go!
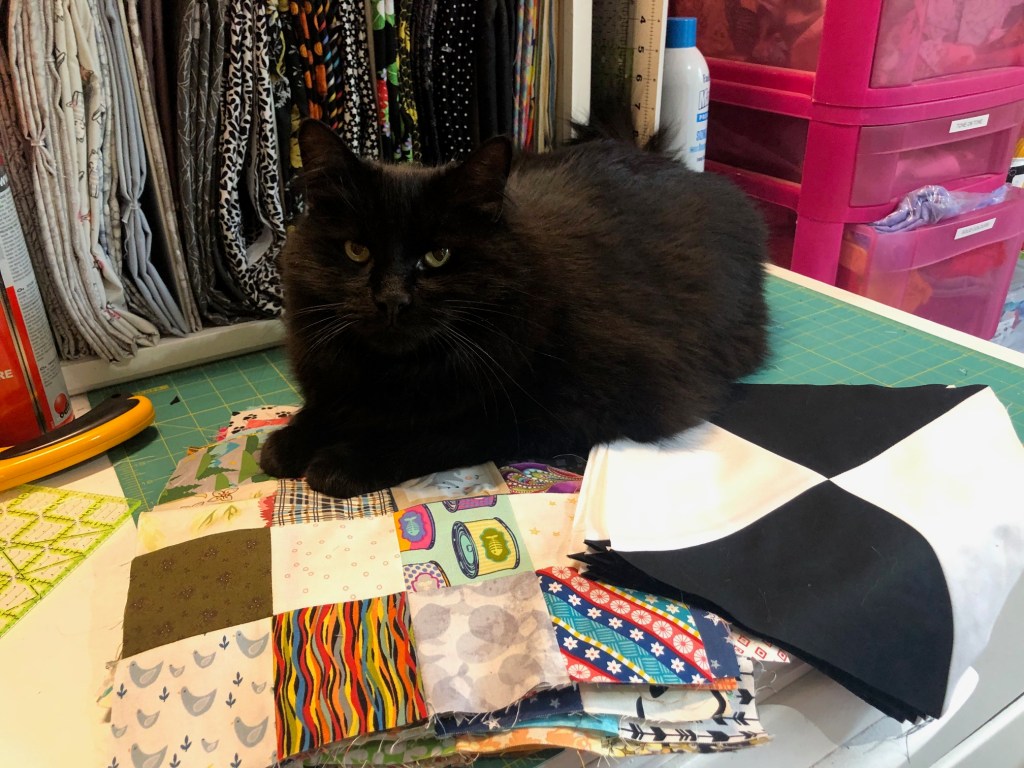
As mentioned previously – I have two Leader/Ender projects that are basically in top assembly stage. Which means they are no longer good for L/E projects and I needed something new.
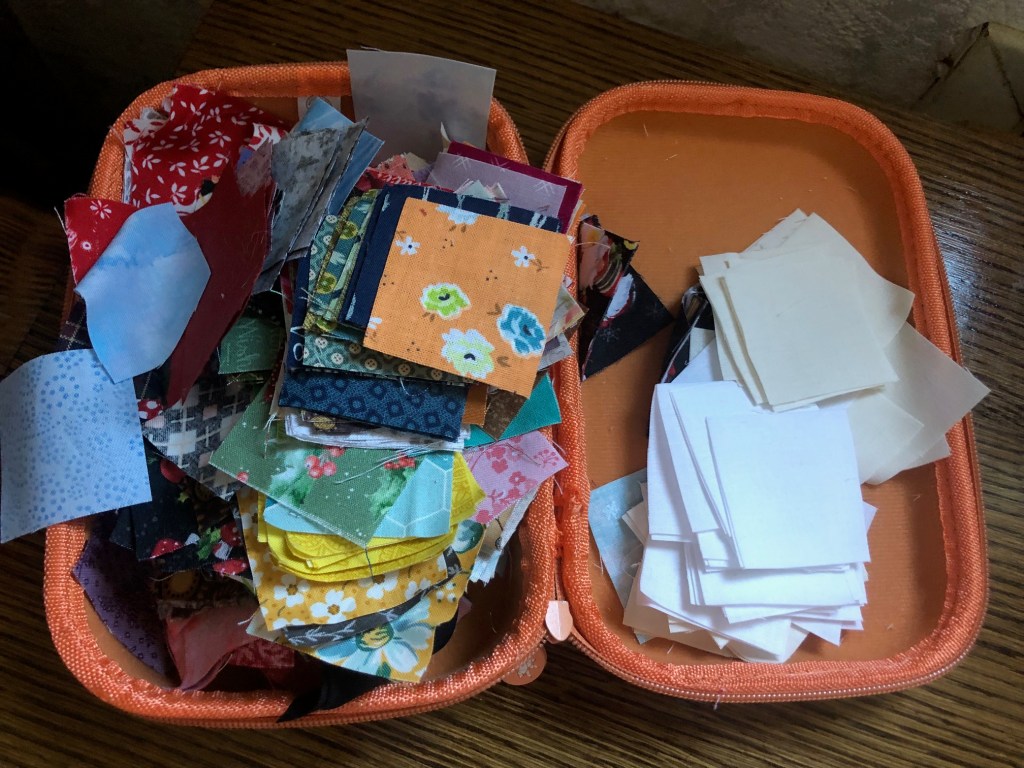
As crazy as it is, I’ve long wanted to make a postage stamp quilt. For the uninitiated – a postage stamp quilt is a scrap quilt made with very small squares – traditionally 1.5 inches unfinished (the size you cut your squares), which means they are 1 inch finished (when sewn together). So each scrap is about the size of a stamp!
Now… I’m not totally crazy – 1.5″ squares can be quite fussy to work with. So I decided my postage stamps would be 2″ – or 1.5″ finished. (Which is apparently a tack a lot of modern quilters take with their postage stamp quilts).
For the last several months both mom and I have been cutting 2″ squares from our leftovers.
I started using them as L/Es back in Yule-y.
I’m collecting the two patches in this giant ziploc, because if my math is correct, I’m going to need a lot of them. For a 50″ lap quilt – it’s over 1,000 squares. (And I’m thinking of going bigger than that!)
I think this is going to be a long-term L/E project. That’s just fine with me. I think it’s going to be amazing when I’m done.
With September officially here, it was time to get working on my WIPs, as promised!
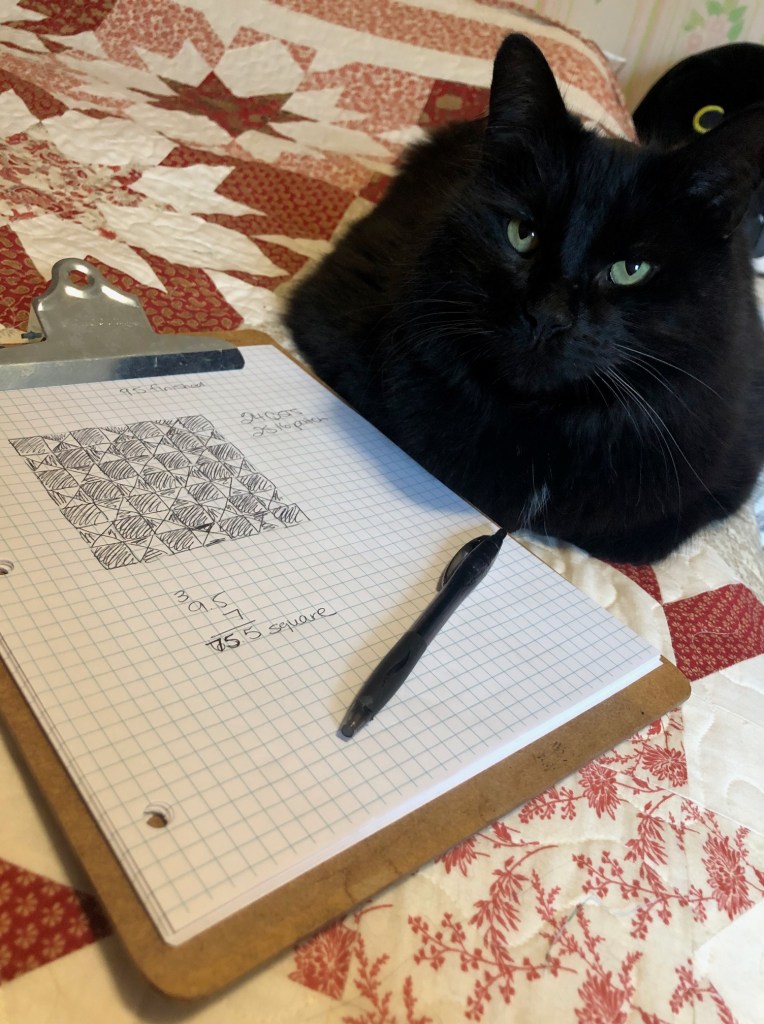
First up, Burton and I decided to tackle the 16 patches we’d made as Leader/Enders. We’d made 25 of them, and had to decide how we wanted to lay them out. We’d been debating on setting them with HSTs or QSTs.
After getting some things down on paper, we decided to go for QSTs They needed to be quite large – 10.5 inches – so I decided to make a couple up just to be I got them right, before diving in and making the 24 needed for the quilt.
Calculations were correct, so we laid them out with a few of the 16-patches to get a feel for everything.
Success! We obviously have a pile more QSTs to make, but I’m hoping I can get this top together on the weekend!
Over the weekend, I was able to finish the moons on the upper wings, and the targets/eyes on the lower wings. Then it was just a matter of filling in the dark blue on the veins. I don’t know how well you can tell on screen, but there are actually five different shades of blue in those upper wings. In some places, the difference is very subtle.
With Mr. Moth done, I just have the greenery around him left. It tends to go much faster, so I might even have this one done by the end of the months!
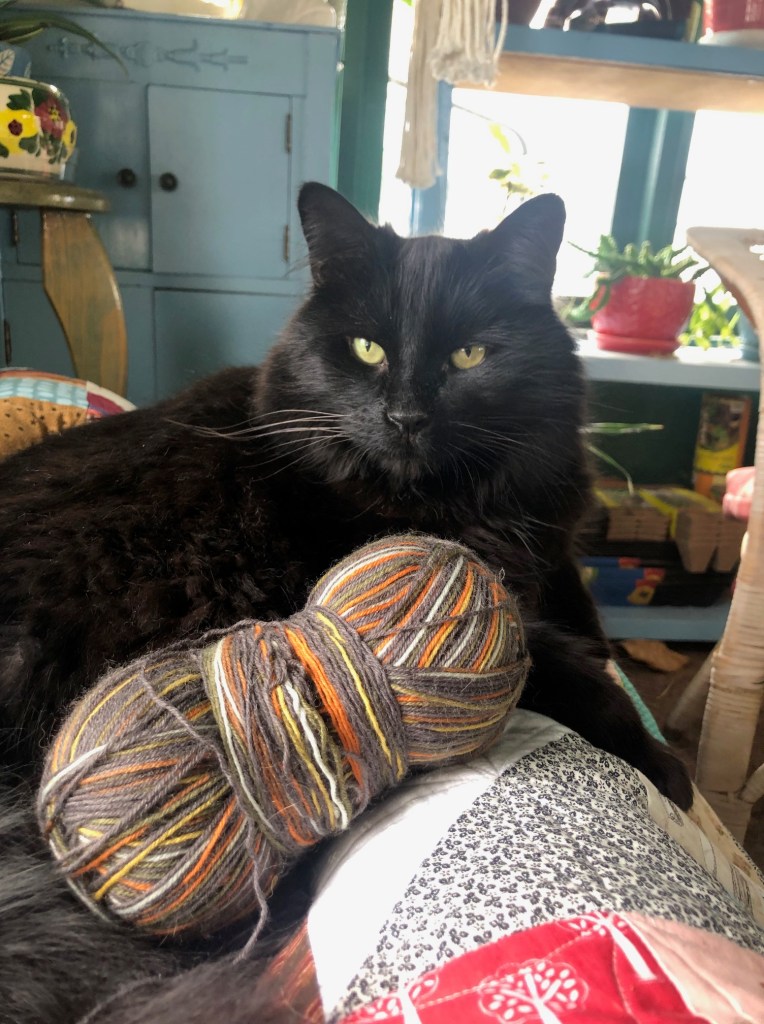
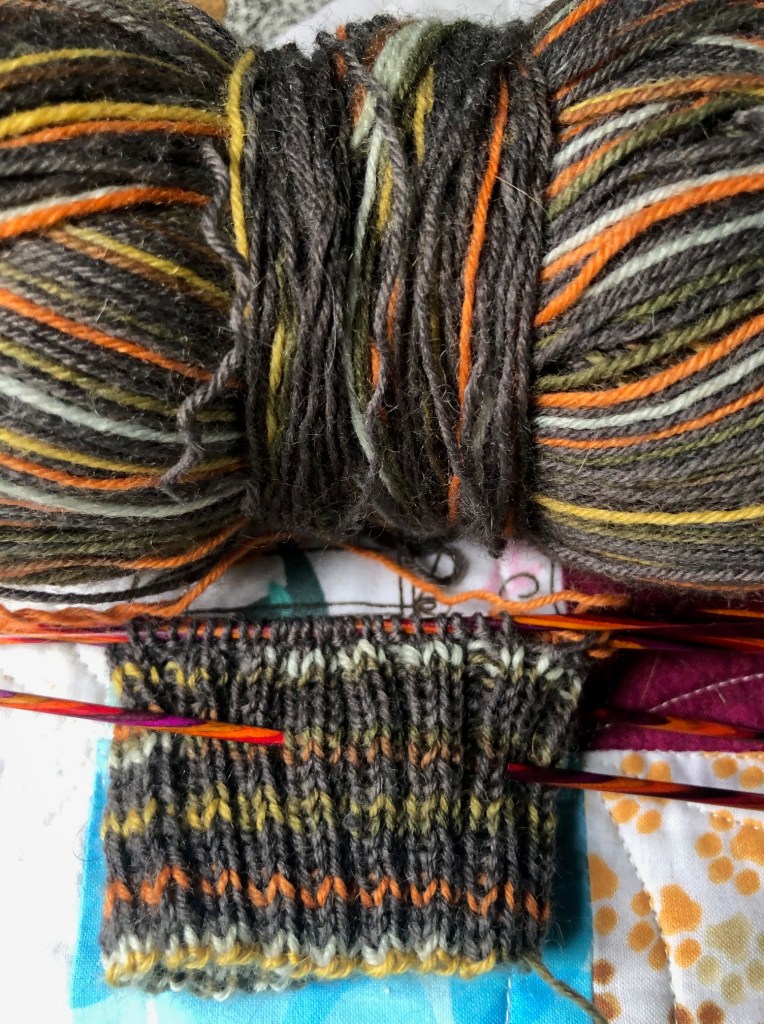
With the Felici socks off the needles, I needed to get a new pair on. The last Men’s pair I needed to make for Christmas. I let Burton go stash diving and he came up with the ball of Lion Brand Sock Ease in some nice fall-like colours.
The ball band says the colour is “English Toffee” but it doesn’t look like any English Toffee I’ve ever seen.
Burton says it doesn’t taste like English Toffee either. Personally, I think I would have called it “70s Sofa”.
Regardless of what it’s called, the weather has been just perfect for porch knitting in the evenings after work.