Flowers for Valentine’s day

I think I’ve told this story before, but when I was a kid, there was a house on a corner on the way into town. It was a lovely brick farmhouse, and the door was fairly close to the road. The lady who lived there always had a beautiful big wreath on the door – a new one for every month.

We’d drive that route frequently, and as a kid, I dreamed of having my own door where I could hang a pretty wreath every month.

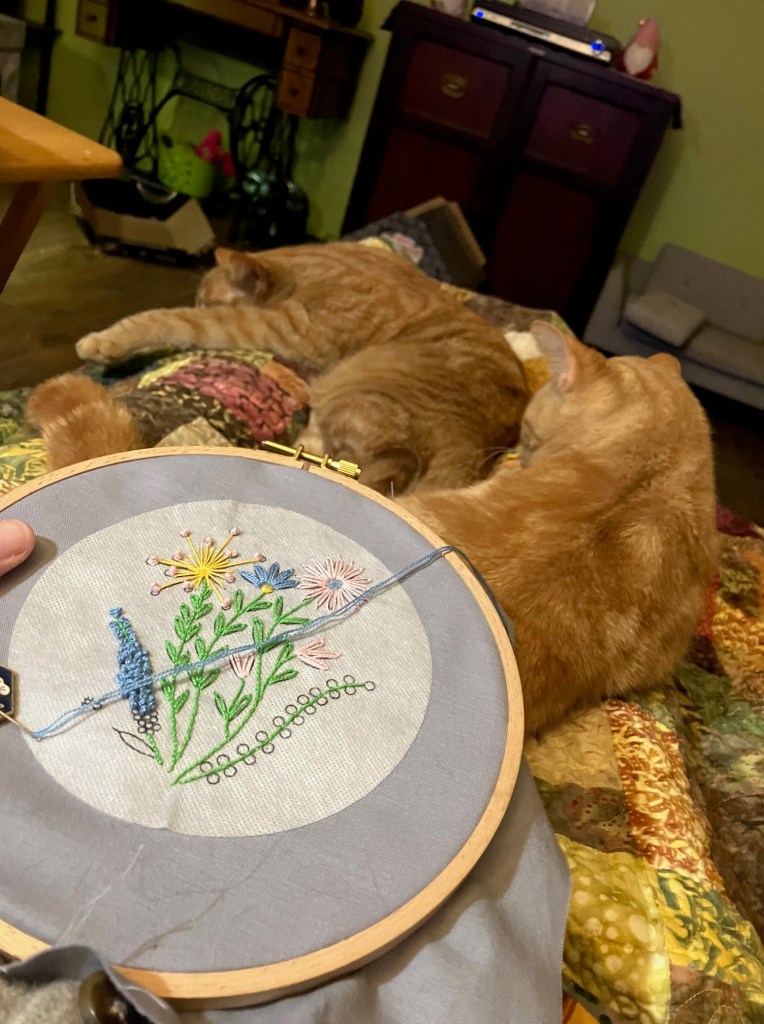
Over the years, I’ve slowly been creating my own collection. I have a Hallowe’en Monster wreath, a Christmas wreath, and the Easter wreath I made last year.

It was time to add to the collection. I had some of the things I needed to make two wreaths – one for January and one for February. But I really needed some silk flowers. So Saturday night, Dave and I made a stop at Michaels.

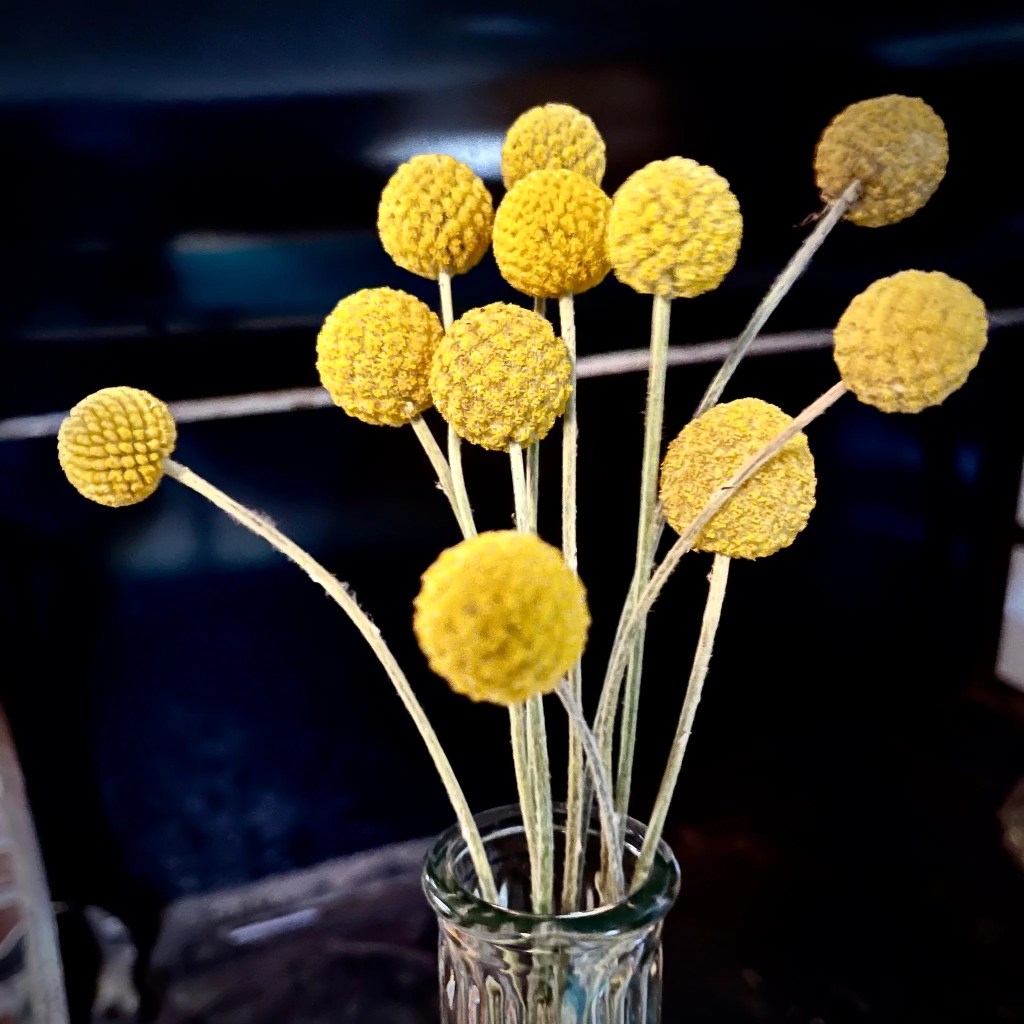
The January wreath was inspired by these little guys.

I picked them up from the dollar store the year we moved here, as well as the rope wreath form. Both have been sitting, waiting for the right floral accents to make it a wreath.

January is a tricky month for wreath creating… how do you make it winter… but not Christmas?

Well… I attempted it with some twigs and pussywillows. The pussywillows are frequently peeking out here in January so I think it’s appropriate. For the green, I opted for a little bit of lavender foliage. Lavender isn’t exactly an evergreen plant here, but it does keep it’s structure and leaves throughout the winter, even if they are a little dead.

I hung it on my door just to get an idea of how it would look, and I’m pleased. Now it’s safely tucked away for next January.

Next… it was on to February…

I’d picked up this wicker heart wreath while thrifting several months back. Clearly it has seen better days. Wreath forms can be really expensive, so I thought it was a good deal, and knew I could breath some new life into it.

I stripped everything but the pink ribbon off it and got to work.

I just love playing with silk flowers! It’s now hanging on the front door, and I couldn’t be happier.

March won’t get a wreath just yet. We found this guy at Dollar Tree on the weekend.

But I do have a grape vine wreath form… so ideas are percolating for May….

About that sock

The poor pink sock just hasn’t been seeing much love lately.

These sad few inches are all I’ve managed to complete since I cast off the kitty cat hat. It’s definitely a case of Second Sock Syndrome. And it’s coupled with a case of WHY THE F@$% DID I DECIDE TO DO SO MUCH RIBBING? AKA “WTFDIDTDSOMR”.

But this week…. this week I’m going to get to that heel if it kills me! (And this much ribbing just might…)

Tiny Needle Tuesday

With a little help from the ginger twins….

I put my mind to it and got all those French Knots knotted! And boy howdy there was a lot of them!

Sadly, I had to take the picture of the final piece when it was still a little bit damp, because I forgot to take it out of the hoop, dissolve the pattern paper, and iron it until late last night. Still – you get the idea.

And…. I may have already bought another embroidery quilt kit… but more on that another day.

Of Chickadees and Robins

By the weekend, we were already two prompts in for the Stay-at-home-round-robin. I had social plans for a good chunk of the weekend, so I didn’t think I was going to get a chance to do anything, despite bein behind.

But… but Friday afternoon… all my plans had been rescheduled! Time to get in that studio.

The first prompt was a King’s Crown block. There are apparently multiple versions of the Kings Crown block…

I decided that the first version would work best for my quilt. Or… at least a portion of the first block.

After fiddling around with the graph paper, I got to work picking and cutting my fabrics. It involved making HSTs…. LOTS and LOTS of HSTS.

I used the eight-at-a-time method, and my handy dandy HST trimmer, and then ironed them all open.

I just love those little chickadees! It was a joy to sew them together into 14 neat looking blocks.

Once they were all together, it was time to arrange them around the centre panel. Naturally, I had help.

My original plan was to make enough blocks to go all the way around the panel. But there wasn’t quite enough fabric in the fat quarters to do that. So instead, I decided to do partial borders… similar to what I did with my Hallowe’en cat panel.

And lucky I did… because it turns out I had measured my panel wrong. It was not 24.5″ square. It was 22.5″ x 24.5″!!!

So the blocks wouldn’t have fit all the way around if there were 20 of them! Sometimes you just gotta love happy accidents.

So… Round 1 is complete. But as I said – I was two Rounds behind. However, Round 2 is…. HSTs!!! And since this block is made completely of HSTs… I’m calling this Round complete too!

Now we wait for Round 3 – which is released today.

Though the boys and I won’t get back into the studio until the weekend, I’m afraid.

Little packets of wonder

Like most of you, we’ve had a very snowy winter so far. The snowiest we’ve had since moving here.

And it’s a sad, daily reminder that I won’t be playing in those beds any time soon. Sigh…

But I can look at websites….

I was a very good girl… and I made a list of all the seeds I still have. The good news is – I really don’t have to buy any more seeds. The bad news is – I really don’t have to buy more seeds.

But the best news is I bought more seeds anyway!

The tomato and Sugar Baby seeds were the only food seeds I didn’t have already. I was going to order them from the place I got all my previous veg seeds, but then I saw these in Walmart.

The zinnias I got because you can’t have too many zinnias in a garden. They are annuals so I have to plant them every year, but they add such a nice pop of colour at the end of the season when so much else is dying off. They go right to the first frost.

Like the zinnias, Poppies and Cosmos are also great annuals to have in the garden. If there’s three colours I’m obsessed with – its dark purples, lavenders, and peachy pinks. Hence the colours chosen here.

I have perenial Scabious (Pincushion plants) already, but you can get a few more colours with the annual versions so I’m giving some a try. And the foxglove and hollyhocks… both are biennials, and don’t always manage to reseed, so I wanted to start some just to keep their levels up in the garden.

Here we have more peachy-pinks in the form of more Cosmos, Snap Dragons and Poppies. And a dark purply sunflower.

But I also snagged those “Strawberry blonde” marigolds I mentioned in a previous post. I’m very interested to see what the colours are like in real life. (I still had white marigold seeds in my stash, so I’ll have those too)

And, I have one more set of seeds on the way

The top two are Yellow Foxglove and Rusty Foxglove. I had the yellow seeds last year, but they didn’t take in my seed trays. I’m going to try sewing them direct this time. The Rusty Foxglove I’ve never seen before, and I think it’s pretty darn cool.

The bottom is a Scabious mix (see previous note about Scabious) and Billy Buttons. I got the Billy Buttons simply because I have a thing for flowers shaped like orbs! Lol.

Now comes the hard part… waiting to plant them all. It’s at least another month before I can start anything inside. But as I noted a while back, I don’t have much luck with that…. so I’m probably waiting until late April at the earliest to plant direct. (and really mid-May is more likely)

But…. for some of the perennials… I can do a winter sow. I’ve had decent luck with in the past. So I think it’s worth a try. And at least it makes me feel like I’m doing SOMETHING.

February Blooms

Here we are in February. I’ve mentioned before the February is the hardest month for me. It may be the shortest month, but it tends to be a very grey month. The skies are grey, and if we have snow, it’s usually at the grey, gross, slushy stage. It’s too early to start seeds, and there’s no prospect of anything happening in the garden.

It’s a month that just tends to drag on for me.

So, I rely on my indoor blooms.

Another bloom on the Passion Flower. I’m so pleased this one is doing so well in the house this winter. I have a very hard time overwintering tender plants like these. It’s so hard to give them enough light and humidity.

I’ve actually had this little Kalanchoe since before Christmas. It was in a little deer-shaped planter. I’ve put the planter away with the other Christmas decor, but I put the plant on the kitchen window. And as you can see, it’s very happy. I’ll probably give it a bigger pot in the spring and put it on the sun porch for the summer.

And in orchid world…

My light pink orchid (which was bought before Christmas at Walmart) had put out a couple bloom off shoots from the original bloom spike. I know they can do this, but I’ve never seen it happen when there are still flowers on the first spike

The only time I’ve seen it happen is like here…

When your blooms are finished, you can follow the stem down. If there are nodes that are a little open, cut just above them, and if you’re lucky, you’ll get a new spike at the node. This one is on the bright yellow orchid that I bought in last summer.

I think orchids may be my emotional support plants!

Friday Felines

I tend to make a big deal about Burton being the main character in the sewing room. And while he’s definitely involved – I think Lemmy may actually beat him for hours “on the job”

This scratcher is in the sewing studio, just to the right of my sewing machine (Burton’s bassinet is to the left of the machine). And if I’m at the machine, you can pretty much guarantee that Lemmy is in the scratcher.

In fact, with the exception of bed time, Lemmy is almost always within petting distance of me. If I’m in the gardens, he’s keeping an eye on me from the catio. If I’m cooking, he’s hanging out in the kitchen to see if I’ll share any scraps. if I’m painting, he’s usually on chair beside me. If I’m working he’s almost always in the office cat tree beside my desk. If I’m knitting or stitching in my chair, he’s either in my lap or on one of his cardboard scratchers on the floor in the living room.

But when bed time rolls around… he’s with Dave. He sleeps between Dave’s feet pretty much every night. He comes to me for a little scratch, but as soon as I stop petting him – he’s back to Dave’s feet.

Such a funny ginger shadow.

Humming along

The weekend once again saw some work on my paint by number.

Bit by bit, I got the little hummingbird all filled in.

This included mixing up a colour to make up for the one paint pot that was all dried up. I’m pretty pleased with my efforts.

And I’m happy to tell you that I found my easel! I stumbled across it when tidying up the sewing studio last weekend! To be honest, it was in plain sight… but we’re not going to comment on that.

On a recent trip to Home Depot, I picked up a 1/4 inch hardboard project panel, which serves as a perfect support to tape my canvas too.

Now Lemmy and I have to tackle all those big pink flowers! We’ve got a big job ahead of us!

A fond bee-bye!

I was planning on trying to finish the slanted four patch quilt on the weekend… but I just wasn’t up to sewing long rows this weekend.

Instead I decided to focus on something new. A few weeks ago, we learned that one of our Post Office ladies will be retiring at the end of April. I think that calls for a quilt!

I dug in into the deep stash and came up with a line I’ve had forever. It’s called Go Tell the Bees… and it’s appropriate, because 1) This area is known for honey production and the town mascot is Alvin the Bee, and 2) she’s not really a post office lady – she actually works for the township office, and part of her duties involve dealing with parcels that don’t fit in our post office boxes. (Basically, the township office doubles as a retail postal outlet).

I knew I wanted something somewhat traditional, but I only had two charm packs (they were bought way back when I didn’t have a lot of quilting experience), so what I could actually do with them was pretty limited.

Burton and I spent a good morning on the design bed playing around with combinations. Finally we settled on floating stars.

You all know how I love star blocks! And the floating star is one of the easiest! It’s basically a nine patch with a little extra snowballing.

But.. to do stars, I’d need something for the star legs. I went stash diving again.

I came up with this lovely light rusty orange. It matched perfectly with some dark tones in the prints of the charm pack. (There’s something to be said for having a very large stash!). It was also a wonderful contrast to the dark purple squares I planned to use as the centre of each block.

To make the floating star, you take four of your charm squares, and start snowballing. First one corner.

Then the second

Instant star legs! And the best part of making floating stars – it’s impossible to lose your points!

After that, it’s just a matter of assembling your nine patch

It took the rest of the afternoon, but by dinner time, we had 12 beautiful floating star blocks.

Now, of course, I’m going to get a little fancy with the layout – but that’s for another day. One where I’m up to sewing long seams.