Indoor a-bloom

This time last week, we got another walloping of snow. And they say March is going to have at least a couple more storms like it under her belt.

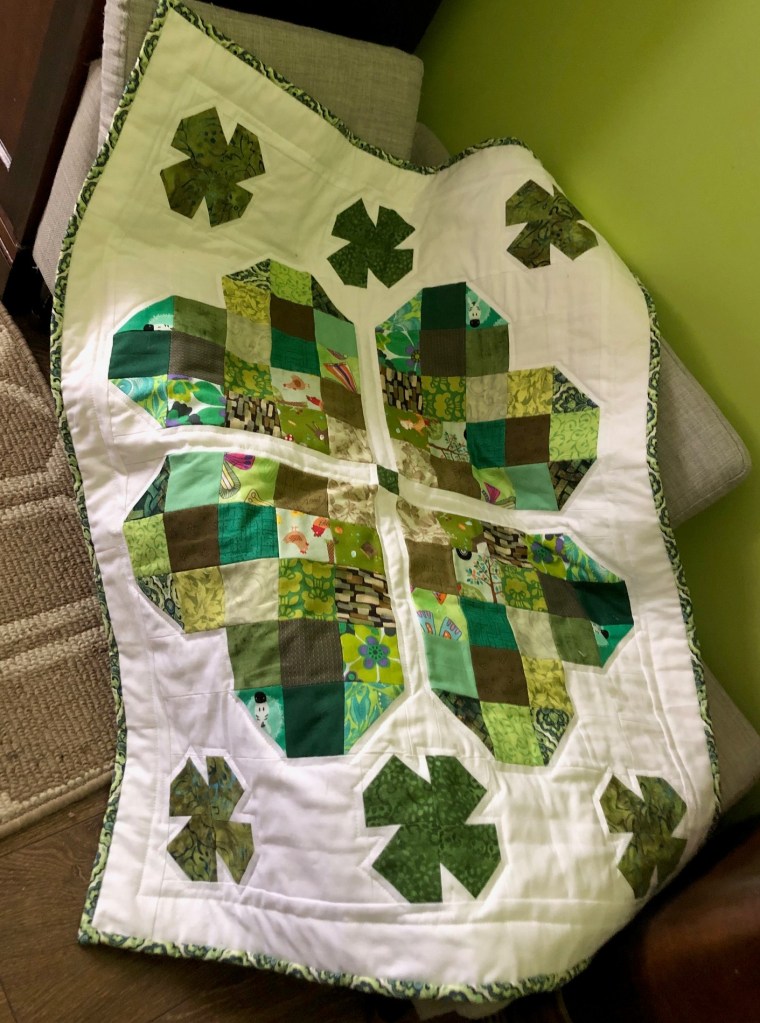
So as much as I want to get out in my garden, it’s just not going to happen. I have to be content with my indoor flowers.

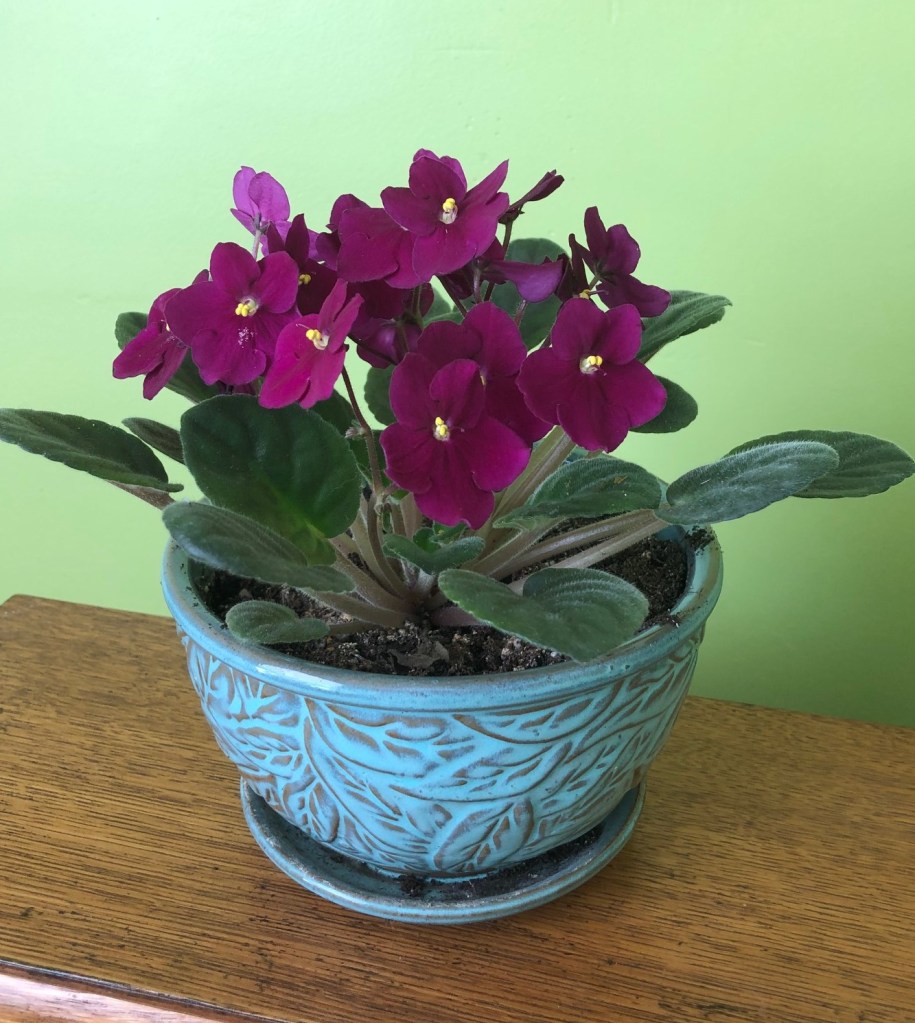
I have several African violets, but I bought this one not long after Christmas because it was a colour I didn’t have. It has NOT stopped blooming since! I don’t think I’ve ever had one bloom this long. All my others are taking a rest now, but they will probably start blooming as soon as they move out into the catio.

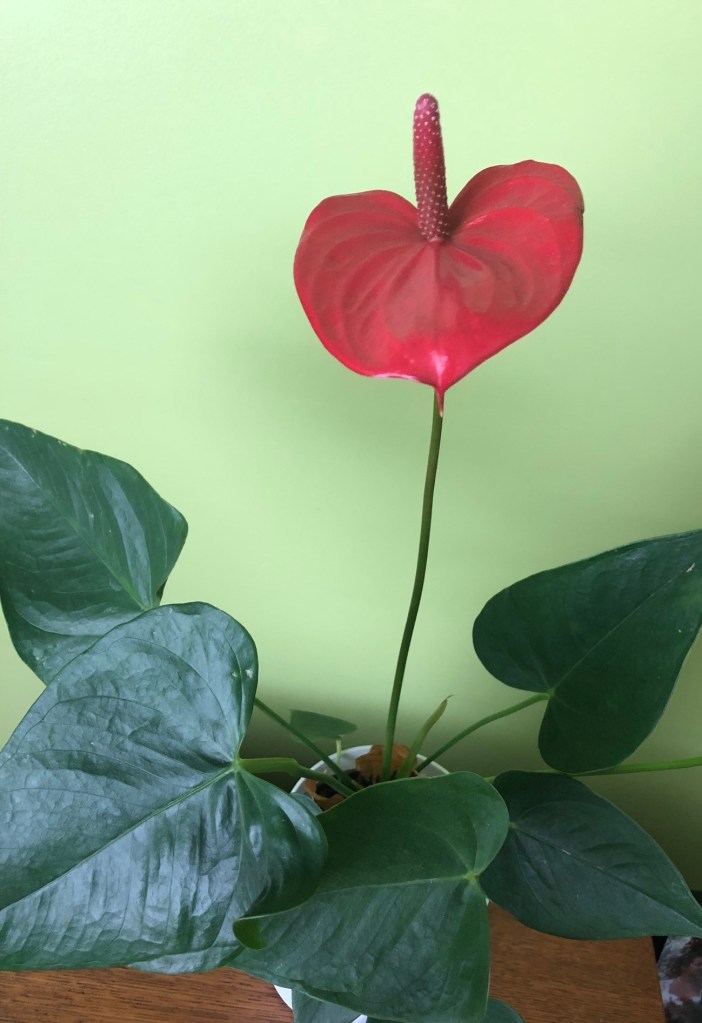
I bought this Anthurium before Christmas. It was a clearance plant and in really rough shape. It’s looking wonderful now and has one big, bold bloom. Anthuriums always intrigue me – that flower just looks so fake! I have a white one and a pink one (both are resting now too) so this red completes my collection

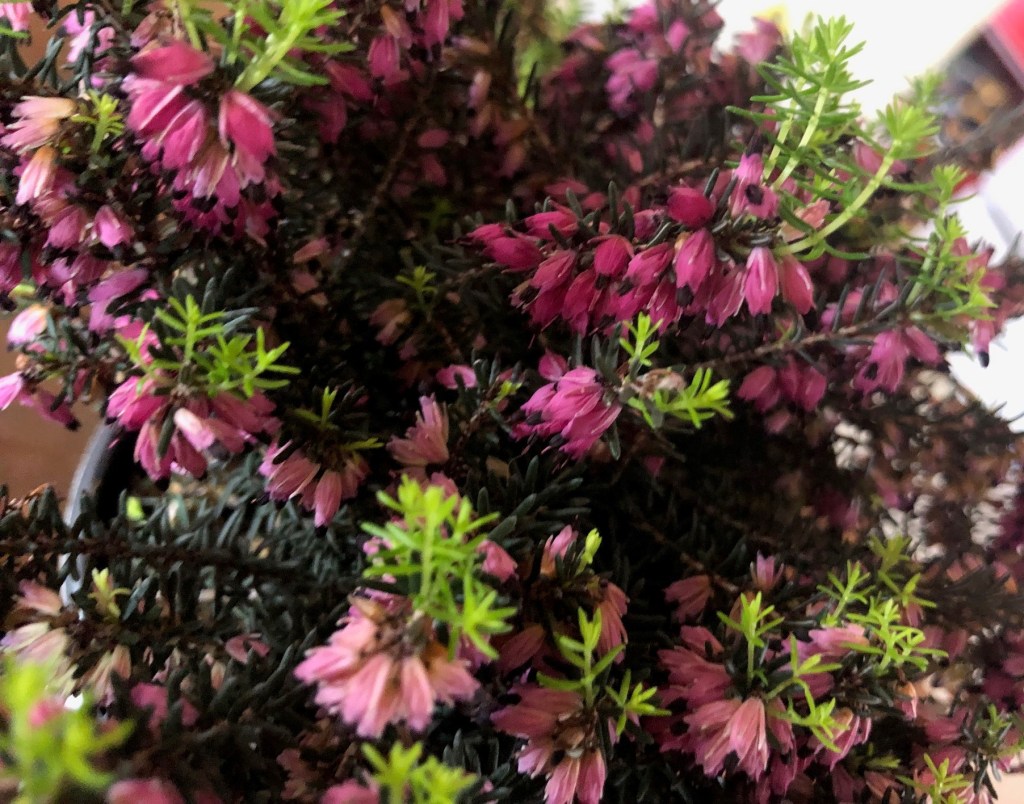
I bought this beautiful Heather plant at the grocery store when I got the African violet. I plan to put it in the garden as soon as it’s warm enough outside. I’ve tried twice to grow Heather (at the townhouse), and both times it died off. I think the soil was too heavy there so I’m hoping the magic soil here will be the difference

As you can see, it’s already sprouting new little leaves, and it’s still in the pot! I think this one is going to be a winner!

And my Hairy Rhipsalis has been blooming on and off since I last showed you. I absolutely adore these little flowers.

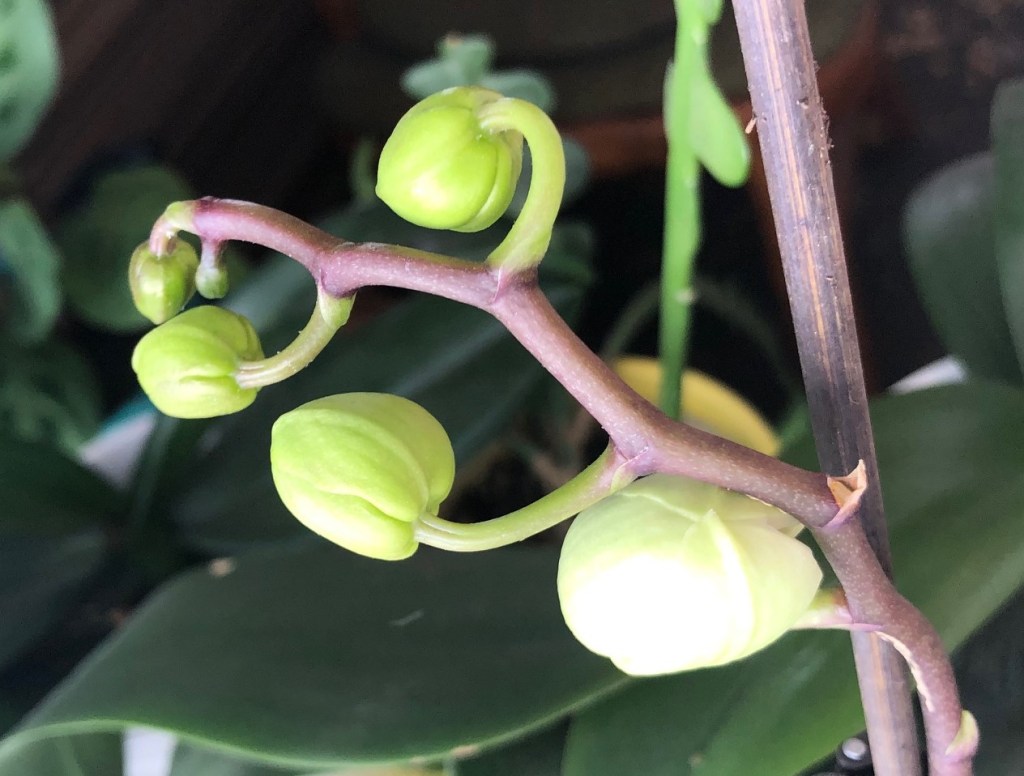
I’ve got two orchids with buds. But they are taking forever to actually bloom! The one on the left looks like it’s going to pop any day now though.

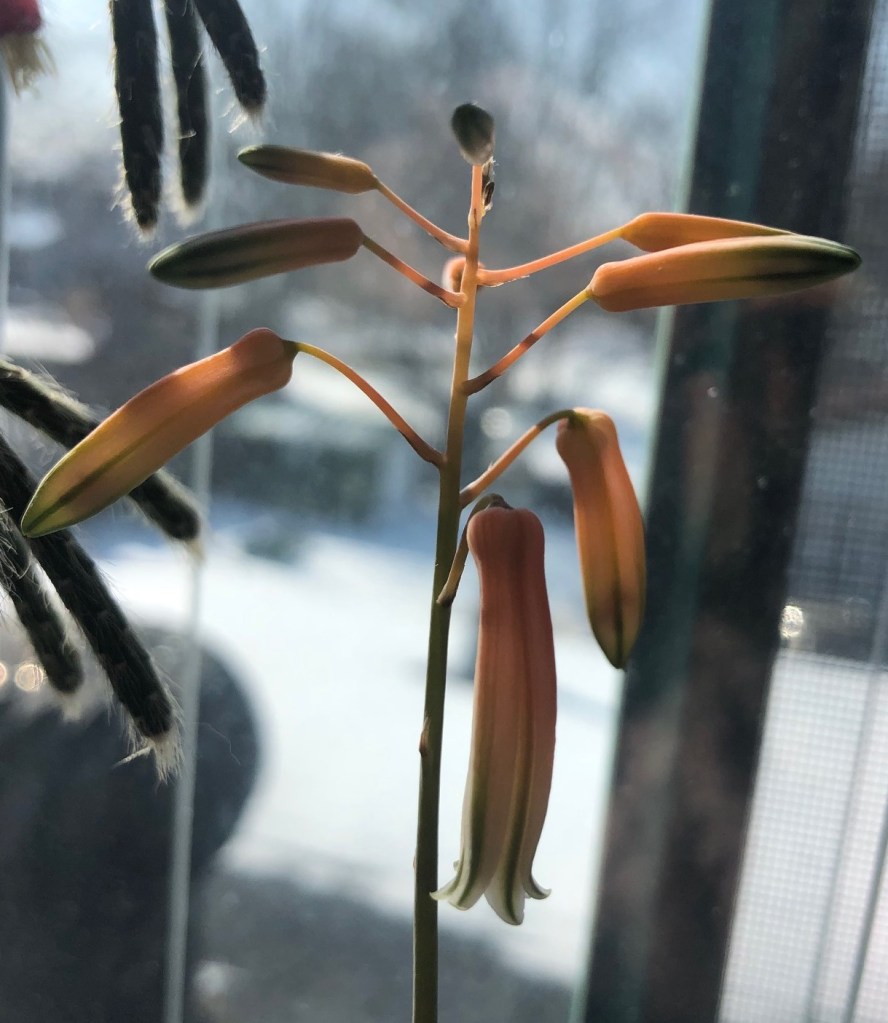
A couple weeks ago, I noticed one of the small succulents in my studio was sending up a tall bloom spike. It grew, and grew and grew… and now has these neat long, bell shaped flowers.

It’s a type of aloe, though I’m not 100% on which one (I think Aloe Albifloa). You would not believe how many types of Aloe there are out there!!! Regardless, I didn’t know that ANY of them flowered. So this was a nice surprise!

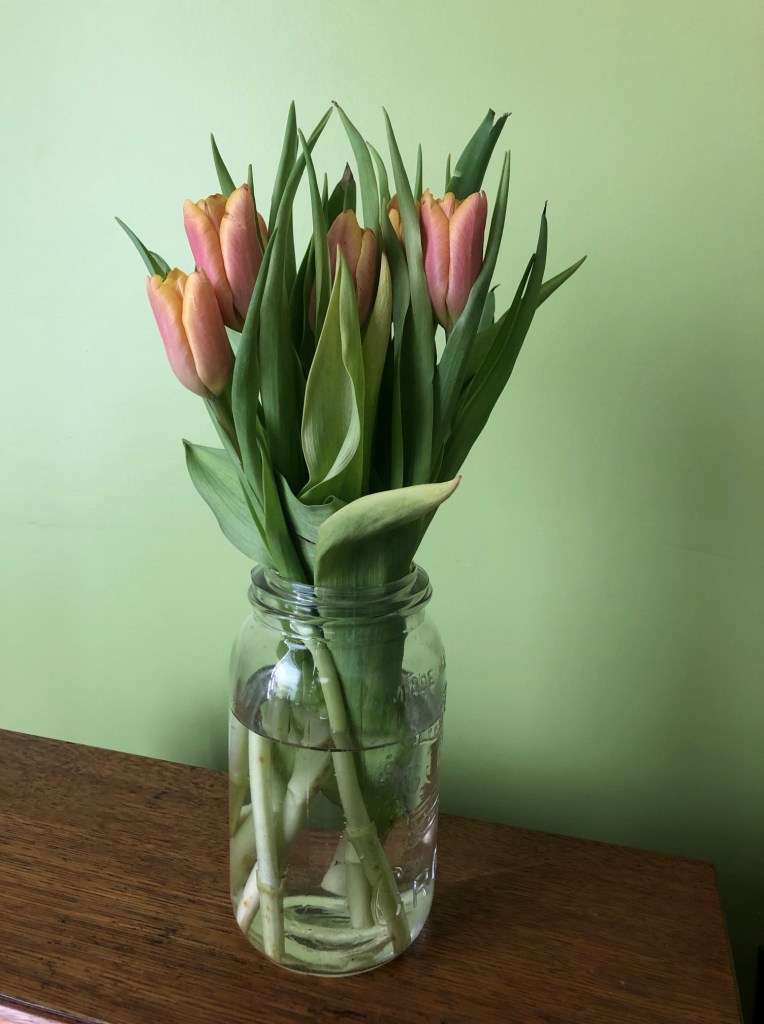
And though I won’t see tulips in my garden for at least another month, I can still bring them home from the grocery store to enjoy!

Tiny Needle Tuesday

Despite the adventures during the day, weekend evenings were reserved for stitching with friends…

And as a result, I almost finished the word “Fresh”

I also got smart, trimmed up the four separate pieces of the pattern and taped them together. It’s much easier to follow now.

Since I’m headed to Mom’s this coming weekend, you probably won’t see much on it for a couple weeks. But there will be several finished quilts to admire in the mean time!

Round Robin wraps up…

… almost.

The last two round prompts for the quilt along have been revealled and like all previous rounds, I decided to combine them

My plan was to get it all done by the end of the weekend. But it’s something that would require at least two days of sewing. And of course, Dave changed my plans for Saturday, so that left me only Sunday to sew.

One of the prompts was pinwheels, and since that was the easiest for me, I tackled them first. I needed 16 to do the design I had in mind. With the fabrics I had left, I decided to do two different versions.

There are many different style of pinwheels, but I think this one is my favourite. Especially when you have contrasting fabrics that really pop with each other.

Next up was square-in-a-square. This one gave me a chance to use a ruler Mom gave me for Christmas. It’s designed to help you make perfect square in a square.

I had to improvise a little because not only was I making square, in a square, in a square, in a square… but the ruler only goes up to 6 inches, and my blocks are 8 inches.

But I managed one. I still need seven more, but I ran out of time. The rest of the blocks, and then border assembly will have to wait for another day.

And that day may be a while… as I’m planning to head off to Mom’s this weekend, and I probably won’t get much of a chance to sew before then.

“You’re going where?!?!?!?”

Antiquing again

We were off on another quest yesterday.

Dave wanted me to drive him to Woodstock to meet with a guy and get some old bumpers for the Charger. I told him if he’s making me drive to Woodstock (just over an hour away), we were going to hit up that big antique market again

I didn’t really have anything on my “have to have” list. I’m keeping my eye out for some Merry Mushroom canisters… but they are very popular and tough to find this side of the border. (American have these in almost every household it seems, if one of my Facebook groups is to be believed!).

But the place is huge, you never know what you’re going to find. And with three levels, it’s a good afternoon of exercise.

I ended up coming home with a potato bin…

I’ve got to do something about that “Tatters”. It should be “Taters”. Or even “tatties” as Dave’s grandma would have said it (pronounced “totties” in her thick Scottish brogue)

I found these two diecast piggy banks for Dad. I’ll put them away for Father’s Day.

And I found this wee little spinning wheel for Mom. I was hoping they’d have a sewing machine too, but no such luck!

And that was it for the antique market.

But around the corner at Lens (Of course I made him go to Lens too!!)

I found some big damn ants!!! I think these guys are going to look great in the garden!!

And last – this little reversible plushie… one side happy, one side grumpy

Or as I said to Dave… one side Lemmy! One side Rupert!

File that one under “Fantastic!”

My comic book boards arrived, so I carved out an afternoon to pull all the yardage out of the drawers, and start wrapping.

For those that aren’t familiar, comic book boards are small, light pieces of cardboard, the stores and collectors place in behind their books to help keep them stiff for display and storage.

But quilters and crafters have caught on, and use them for storing fabric!

I ordered a stack of 200 and they came with a pile of little plastic clips to help keep the fabric secure. It’s a pretty simple process.

Lay your fabric out flat and place the board at the bottom:

fold in both sides

Then wrap the fabric until there’s no more to wrap and secure with the clip. (If you don’t have clips, bobby pins would work too)

The result is a nice, neat, stiff piece of fabric that’s perfect for organization and storage. What I like too is you can keep any scrap pieces wrapped up secure with them too, simply by tucking them in behind the cardboard before wrapping.

With the first one done, I set about doing the rest. It took much longer than I expected… alllllll afternoon AND most of the evening, with only a short break to grab a quick dinner.

It was a such a long project that all four of the snoopervisors took it in shifts.

But eventually, it was all wrapped and the only thing left to do was get it all in the file cupboard.

I am absolutely THRILLED with how it turned out, with the exception of one thing…

Notice how the bottom row looks a bit… squished??? Well it turns out that the bottom row is about 3/8″ shorter than the top row!!! Why??? I have no idea. So the cardboards are just a touch too tall. I got them all in… but…

Mom had a good idea… they boards can all be cut a little shorter… but that means unwrapping and re-wrapping all those bottom ones. So instead… I will trim the boards down as I use them.

And with all that fabric up here, I can not only see and use my yardage more easily, it freed up three of the drawers for other things. I ended up filling them full of backing yardage that was just piled up beside the dressers. It’s not all my backing yardage, as there’s still some in a bin, and a little on top of the bin. But I don’t have piles that fall over all over the place if you breath on them wrong!

Burton thinks it’s a job well done! And so do I!

Birds of a feather

Whenever I have a chance, I’ve been out in the yard, stalking the birds with my new long lens.

Even with the advantage of the lens, the birds remain elusive and wary.

The sparrows are the easiest to capture. There’s alway an army of them in the HUGE trumpet vine that covers my neighbours backyard arbour. At any time, I can fine anywhere from 10probably 30 of these little guys up there.

But I noticed, they have a couple interlopers.

It’s a juvenile Brown-Headed Cowbird. You may not know, but cowbirds are a little sneaky – they lay their eggs in other birds’ nests, and let those birds raise the babies. When they are old enough, the babies head back to their cowbird family… and start the whole thing over again… crazy eh?

But I don’t think it’s the same for Starlings…

But this starling is almost always hanging with the sparrows. Maybe he was an orphan, and they took him in?

Even though the sparrows are so common, I do think they are pretty darn cute.

But it’s really the colourful birds I love. The cardinals have NOT been cooperative, but this little Red-Headed House Finch did a little modeling for me.

I’ve seen a few Gold Finches too, but haven’t been able to get pics.

And though the Blue Jays LOVE to sit in the trees and scream at me, getting them on film has proved difficult. I get a lot of blurry shots and blue-jay butt…

They do love this peanut ring I got last year.

It should keep them coming around so I can get more pictures.

FO: Burton’s Lucky Charms

It is finally March!!!

The weirdest thing…. February was just flying by, but then all of a sudden, the last week and a half just started to drag. It felt like March was never going to happen.

But then it did… so it was time for a decor change

Out with the heart quilt, and in with the shamrocks!

About mid-way through February. I decide Burton’s March quilt would have to be centred around St. Patrick’s Day. But I didn’t have any St. Pat’s-themed fabric in the stash. And as much as I love my fluffbutt, I wasn’t about to order fabric to make him a quilt. His quilts are all supposed to be about using leftovers.

So I turned to the internets for inspiration and came across several shamrock/clover blocks, and sketched out my idea.

As you can see, the large shamrock is made up of a pile of green scraps. It was a little more time consuming that I planned. Usually I like Burton’s quilts to be quick, easy projects, but I think this was work it in the end. The border shamrocks are just dizzy daisies without their centres.

The whole thing was quilted with a 1/4″ line outside of each shamrock, then bound and put on his wee chaise.

And now Burton feels like the luckiest cat in the world!

Tiny Needle Tuesday

It was a rather busy weekend, so there’s not much tiny needle progress to show you.

This sad bit of stitching is all I managed to accomplish. and as soon as I put that last stitch in, I promptly ripped it all out. I’m making the “butt nugget” sign on the right. And the designer has put the pattern over several pages. That’s fine… but she didn’t centre it over the pages. Stupid me, was starting late in the evening (when I should know I’m too tired to start a new project) and I centred from the centre of the pages, not the pattern! (There’s no actual pattern centre marked – you have to figure it out yourself). It took me all those stitches to realize I would be wasting a buttload of fabric if I kept going.

And let me say… ripping back knitting is one thing… cross stitching… it’s a whole other animal, and not a fun one! I’d rather tink back knit lace than pull out all those tight, tiny stitches.

But I did. And by next Tuesday, I hope to have a proper TNT post for you.