Ocean sapphires

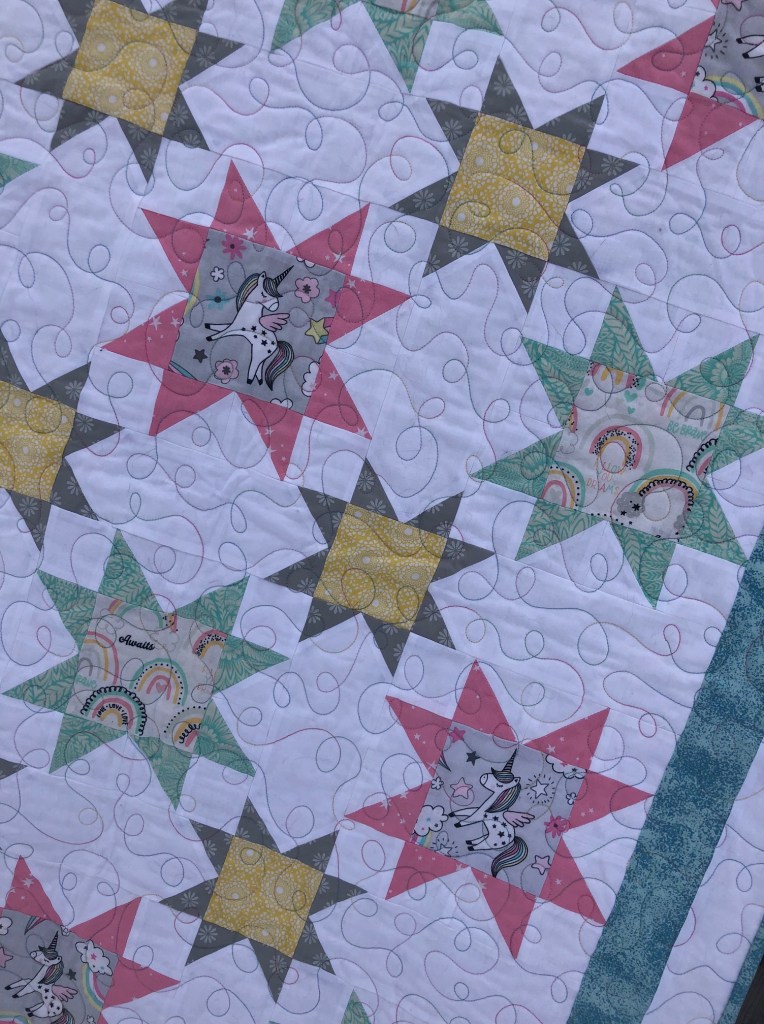
This weekend I was all excited to do this month’s Rainbow Scrap Block. The colour is aqua/teal, so I went through my scraps and pulled out the fabrics I needed to make a pile of HSTs. Then I started cutting the white fabric for the background…

Then I ran out of white fabric…

With white, cream, black, grey and navy (our basic background colours), Mom and I buy them by the bolt. The bolts live at Mom’s, and I just cut off a few yards at a time as I need them.

But when I was there last weekend, I didn’t realize how low I was. I didn’t bring any home with me. And it’s not like before, when I could just pop up and get some at my earliest convenience. It’s a 2.5 hour drive now, and at $1.50/L for gas, even if I had the time to burn….

But with no white fabric.. I couldn’t finish the rainbow scrap block, or do the next round on the Round Robin quilt, or add the border to the gnome panel, or even start the new quilt Samantha just commissioned…

(Oh… that’s why I was so low on white!!!)

Since I obviously use a lot of it, I decided it was time to get my own bolt, and put an order in to MSQ. Sadly delivery isn’t instant, so I had to figure out what I was going to sew.

There was only one project on the go that I could work on, and that’s because I’d already cut out all the white pieces I needed for it. (In fact, that’s where the last of the white fabric went)

If you’ve been hanging around the Bearbottom Facebook page, you’ll have gotten a peek at this one already.

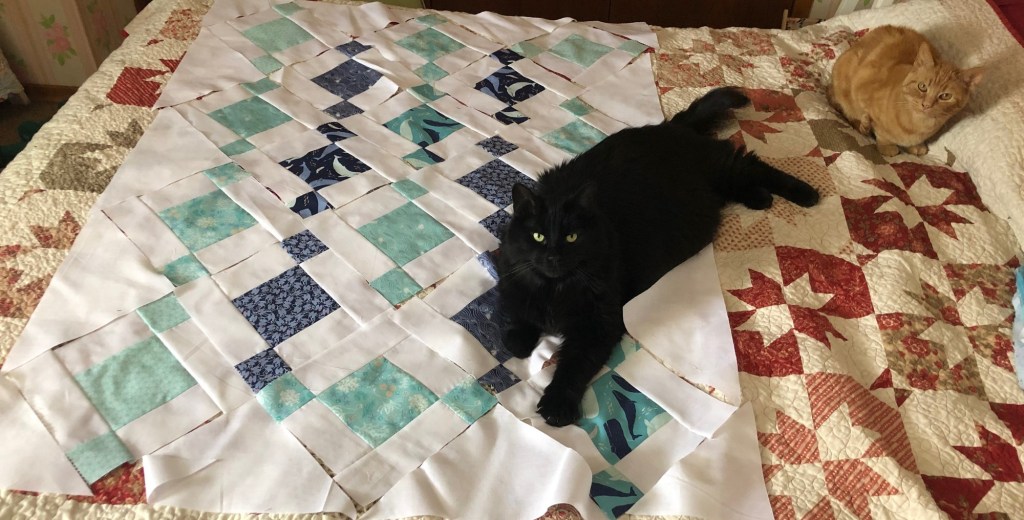
The pattern is the Chandelier Quilt. I first saw the pattern when ChrisKnits made one, and I fell in love with hers immediately. It’s the pattern I plan to use for my Kitty Corn quilt, but I thought it would be fun to try it out in baby size first.

I used some leftover charm squares from a fun ocean print line I bought a few years back (I made A Fish Called Rhonda and Sea Stacks with them) I put the blocks together in an afternoon the week before last. I had hoped finish the top before going to Mom’s for my quilt weekend, but I ran out of time. So, on Saturday (since I could sew nothing else) I laid it out and started sewing it all together.

I love on-point quilts, but they can be a little fussy to sew together. Happily, this one didn’t cause me any trouble, and it was together in no time.

It’s such a great looking top. And it’s going to be even better looking when it’s quilted.

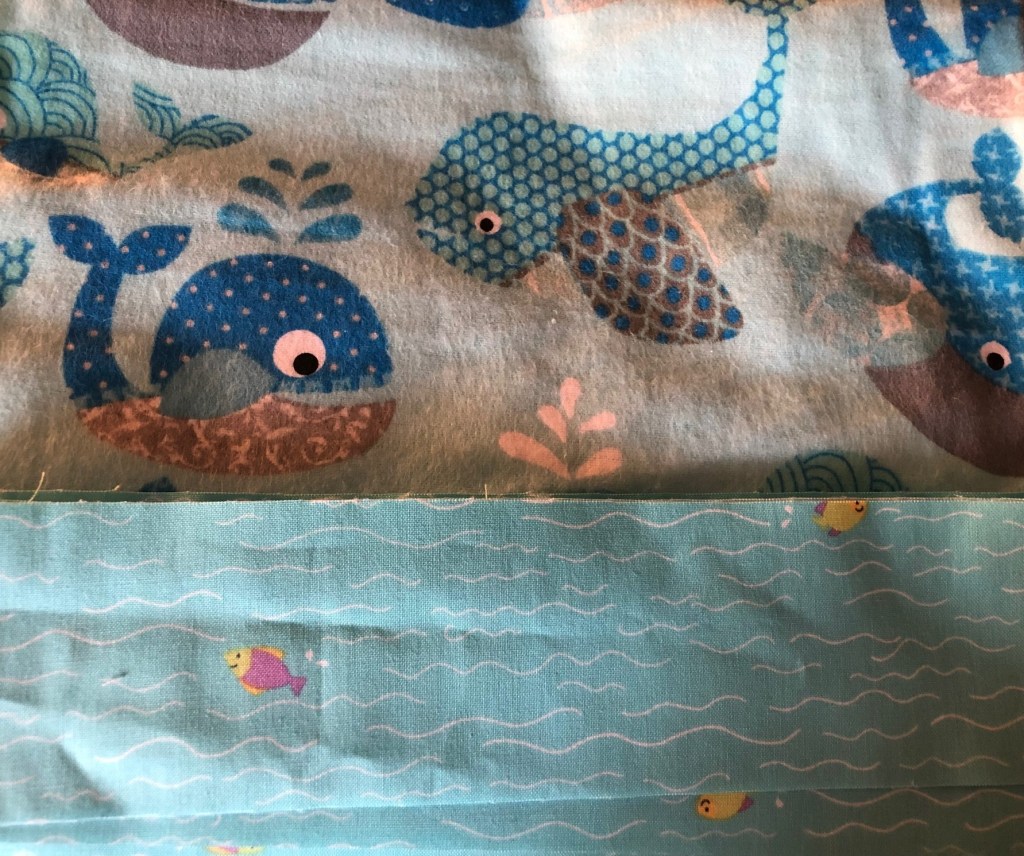
Especially with this fun whale flannel for the back, and these cute little fishies for the binding!

My little grow operation

Last weekend, I mentioned that I has plans to grow some seeds indoors, as well as the winter so I showed you.

Years ago, in the townhouse, I grew some seeds on Grandma’s table under the dining room window. Dave wasn’t too keen on the idea, and it did have some drawbacks. The light wasn’t quite bright enough there to get really good seedlings. It also took up a lot of space that we didn’t really have.

But as you know… we have MUCH more space here!!!! Still… Dave said Grandma’s table was off limits, so I had to come up with something else.

I looked at grow set-ups online, and if you’ve ever done that, you’ll know they can be quite spendy. I knew there had to be a better way to do it. Since what I was looking for was just basically shelves and lights, I decided to buy just that.

I got one of those black plastic utility shelf units on sale at Canadian Tire. It was just $30. Then I ordered a set of grow lights from Amazon for about the same cost. They are three separate lights, but all connected to one control – perfect for attaching to the shelves. They attach with double-sided tape, and the shelves fit together with no tools at all, so it’s a super easy project, and way less expensive than those other fancy set ups.

Another $40 filled it with peat pods and grow trays! I won’t be planting anything until mid-March… but I’m ready to grow!

In other plant news….

I’m afraid my Ranunculus sprouts just up and wilted away. Not sure what happened, but like I’ve had no luck with them in the past. I might try again when it’s warmer outside.

My sunflowers haven;t gotten any taller, but one has gotten bigger leaves. The other, in the back, is starting to yellow a bit…. but if you look closely, it’s got an itty bitty flower head. Time will tell if it will actually blooms.

And… on the way home from Mom’s last weekend, I stopped at Terra. It’s a HUGE nursery chain and the one by her always has a fantastic selection of house plants.

I came home with a String of Turtles, and a Pickle Plant! (Just look at those tiny pickles!!!!)

And… I’m very excited about this next one. You may remember the weeping pussywillow I had a few years back. Sadly, it didn’t make it more than a year, but I think that was because I kept it over winter in a pot, when I really should have planted it in the ground.

I hadn’t seen any since, so I was thrilled to find them at Terra

I’m thinking this will probably go out front, but I’ve got to sit down and draw up some plans. That’s a way off – for now I’m just going to enjoy all those fuzzy little catkins!

I am Hemlocked

When last you saw the Hemlock Ring it was a giant lump of knitting. Well dear readers… I am sad to say…

… it is now a much smaller lump of knitting. Not long after I got it on the extra long needle, I got to another pattern row (it’s four rounds of plain knit, and one pattern round), and I thought to myself… “gee, there seems to be a disproportionate number of yarnovers to the k2togs.”

Hemlock ring is basically a round feather and fan. And in F&F, your decreases (K2togs) have to match your increases (yarnovers). Being round, they don’t have to match as you are increasing, but they can’t be wildly out of whack either. With the number of yarnovers I had to decreases, I’d basically created a giant, ruffled monstrosity.

Normally, I’m fine with leaving in a mistake or two, but this mistake was so exponential that it would have been a nightmare to try and block. So I frogged back to where I think I went wrong, and got it all back on the needle.

I haven’t had much time to start re-knitting yet, but I will tackle it properly this week. But sadly, at this rate, I won’t need the warmth by the time it’s done.

Friday felines

As I said earlier this week, I spent the weekend at Mom’s.

This greatly upset a certain someone:

While she is fluffy and adorable, and sinfully soft, Miss Winnie is not a fan of people.

Oh, she adores my Dad. And I she tolerates, and maybe just a little bit, likes Mom. But to Winnie, the rest of the world can take a hike. Me especially.

As soon as I walk in, I get a look of pure and utter disdain that just screams “Why are YOU here again???”

And though she doesn’t like people, she’s not one of those cats who runs and hides from company. No… Winnie sits there and stares you down. She follows you from room to room, distrustful of your motives.

When I’m in the basement quilting, she watches me from the back of a chair.

…her tail, swishing about in annoyance.

In the living room, she reposes on her curl, but never takes her eyes off you

Even when you want to get a little shut-eye. She’ll just jump up on the bed…

And stare at you until you fall asleep.

She’s cute… but she’s kind of a creep.

FO: Pegacorns on Parade

The last finished quilt continues the star theme, but in a slightly different style.

It is, of course, those fabulous pegacorns.

I’m not a big fan of pastels, but these ones are just bright enough to be really fun. I tried to highlight them with a fun rainbow thread.

It doesn’t show up great here, but it’s pink, blue and yellow just like the shades in the quilt. And of course, I had more of those fabulous pegacorns for the back.

But they are FLANNEL!!!! It’s such kismet when this happens, because I bought the original fat quarter pegacorns from Walmart, and it was a few months later that I saw the flannel version online at Lens! I love it when the universe brings it together like that.

And now.. these pegacorns have paraded on into the shop!

FO: Baby Supernova

Next up in the finished quilt line…

Like yesterday’s quilt, this one was to use up the rest of a pile of coordinating prints. This time the space prints. Unlike yesterday’s quilt, I didn’t need to go searching for anything to add to this one. I still can’t believe I got three baby quilts from a fat quarter bundle, a panel, and a yard of the star fabric, a yard of grunge, and a couple solids mixed in. The other two are here and here

These fabrics are so fun. The other two space quilts found homes pretty quick, so I’m sure this one won’t be around long.

There’s more flannel for the back of this one, keeping with the space theme.

Like the sea quilt, it’s now in the shop, just waiting to blast off for its new home!

FO: High Seas Baby

I spent the weekend at Mom’s and banged out the quilt tops I had piled up since November. It was just three small baby ones, but it feels good to have them finished.

First up is High Seas Baby

This one came from a desire to use up the rest of the prints from Ahoy Matey. I didn’t have quite enough to do the pattern, so I scrounged the stash and was able to add in a few more prints that worked (leftover from other quilts)

You all know how much I LOVE that crab fabric! This quilt pretty much used up the last of it (though I think there’s some in my scrap bins still) I was also able to use some fun seagull fabric as well as a few random red patterns.

You may recall that I was going to use some Whale flannel for the back. But then I came across these anchors….

They were flannel too, and just too perfect to pass up. But don’t worry, the whales will find a home on another project (already in the works).

But for now, this one is in the shop, and I’ve got two more to show… but that will wait until tomorrow.

FO: Harriet Bolero

As I mentioned yesterday, I did get the Harriet Bolero finished. It had a little soak, blocked and dried just beautifully:

Isn’t it sweet? It’s a very simple top-down design, but oh so classic. The only modification I made was to put long sleeves on it. I hope they are long enough for Miss Wren, because I had to take the length measurement from a different pattern. (This pattern only has short sleeves).

Adding the longer sleeves used almost all of the two skeins of Fat Cat I had. I searched the button stash for the perfect buttons. I didn’t have much in pink that was the right size, so I ended up taking a different tack.

I think it works!

Now, I have to decide on a dress to go with it. I’m torn between these two from old Navy

I may just watch for a good sale and get them both!

Ring around the hemlock

Although I’ve had the new longer needle for the Hemlock Ring blanket for a while now, I wanted to get Wren’s bolero out of the way first. It’s blocking now, so I finally picked up where I left off with Hemlock Ring.

It still doesn’t look like much – just a big pile of blue fluff.. but it is going to be beautiful when it’s all stretched out. Sadly, the rounds take FOREVER now. I’m not far from the finish line in terms of rounds, but there’s a lot of stitches between here and there, and every four rounds it increases! Still, I’m aiming to get this one off the needles by next weekend.

Then I have to find a floor big enough to block it on…. yikes!

Sow over winter

Although I hate to wish the time away (seriously, January just flew by) you all know how much I’m longing for spring.

I can’t do ANYTHING outside right now. And though I’ve set up a pretty neat indoor grow station (more on that another day), it’s still too early to actually plant anything in it. But all is not lost…

Remember the Winter Sow method?

I’ve tried it three times already – here, here, and here. I didn’t do it last year, because I knew we’d be looking for a house in the spring, and I would be leaving my gardens behind.

But this year, we aren’t going anywhere, and I’ve got LOTS of seeds to work with!!!

My little tin seed holder is filled to the gills!!!

This year is a little bit of an experiment. You’re supposed to use milk jugs, pop bottles, things like that. But I don’t have any of those. I had a cider jug, and an empty windshield washer jug, but I’m also trying out a few other types of containers, including a couple jujube containers and a rostisserie chicken tub.

I planted up some scabiosa, oriental poppies, coneflowers, black-eyed susans, and delphiniums.

They are now out in the frosty fresh air, and with any luck, come spring, we’ll see some wee little sprouts!

If you’d like to learn more about winter sowing, here’s where I learned about it.